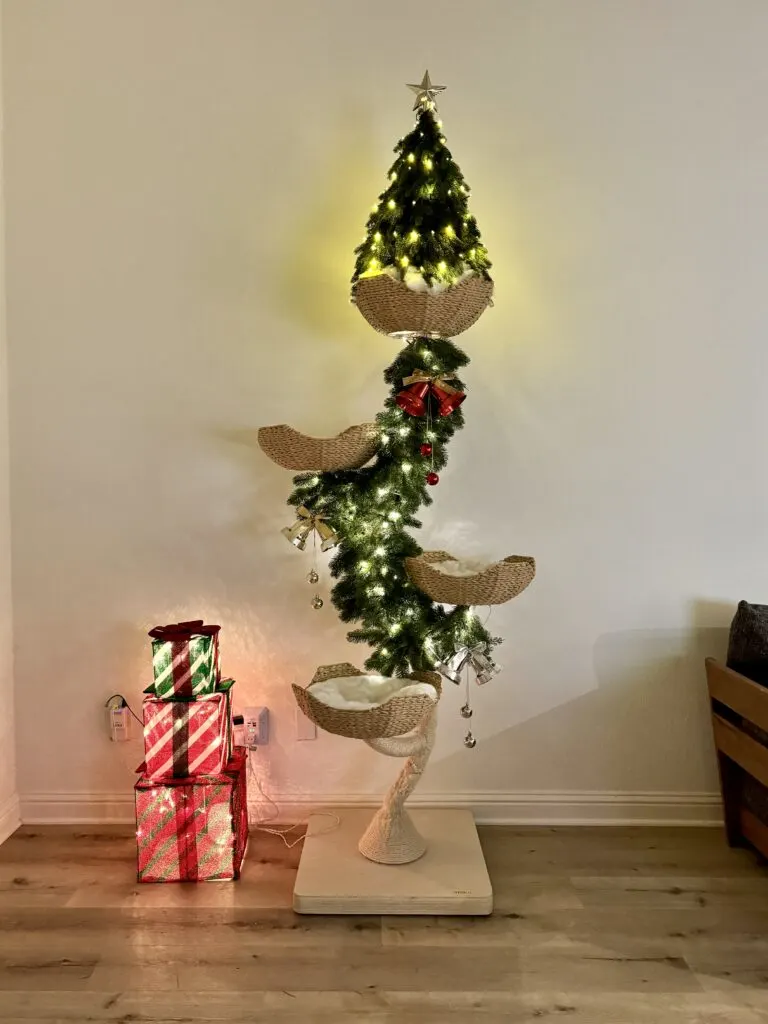
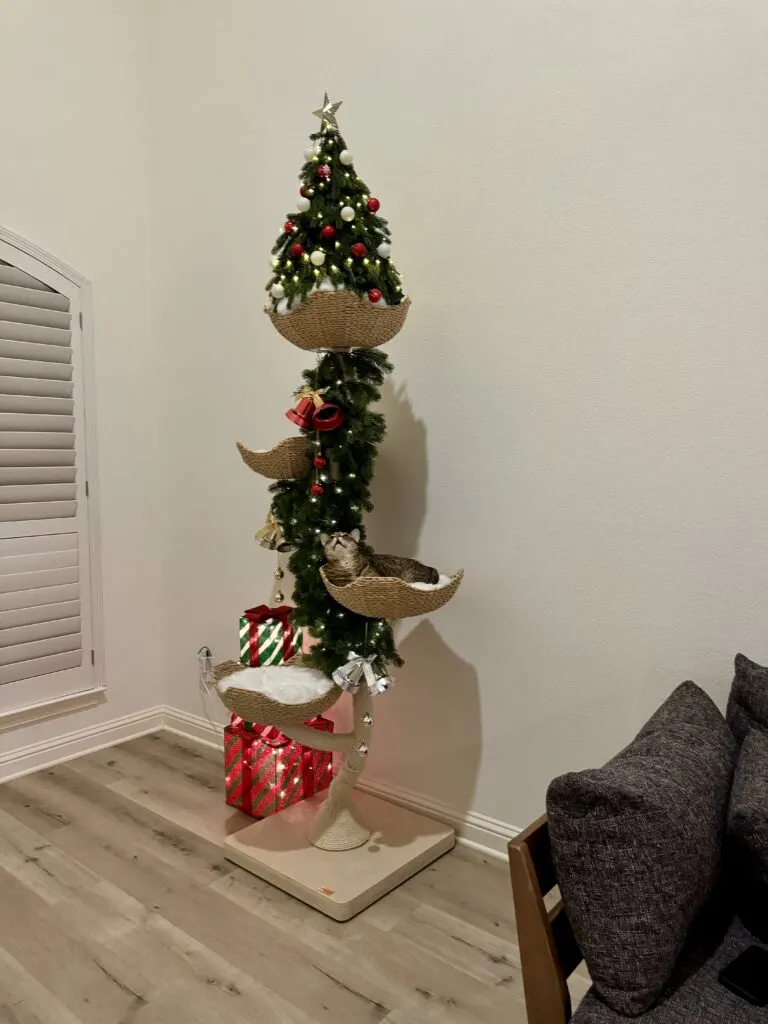
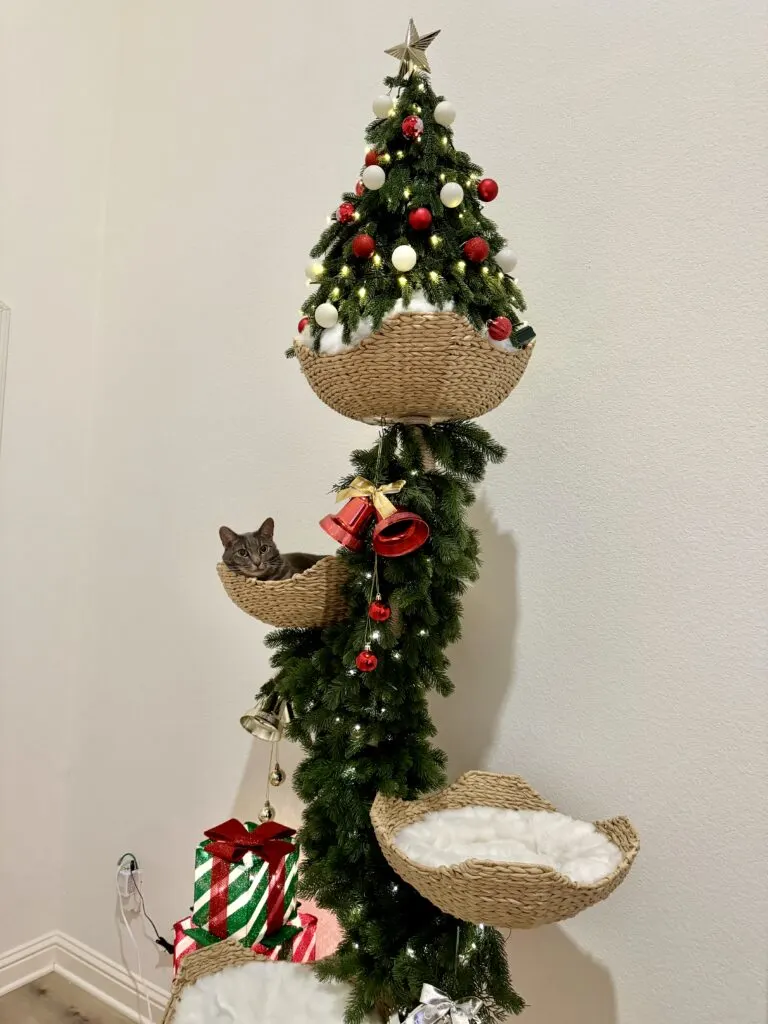
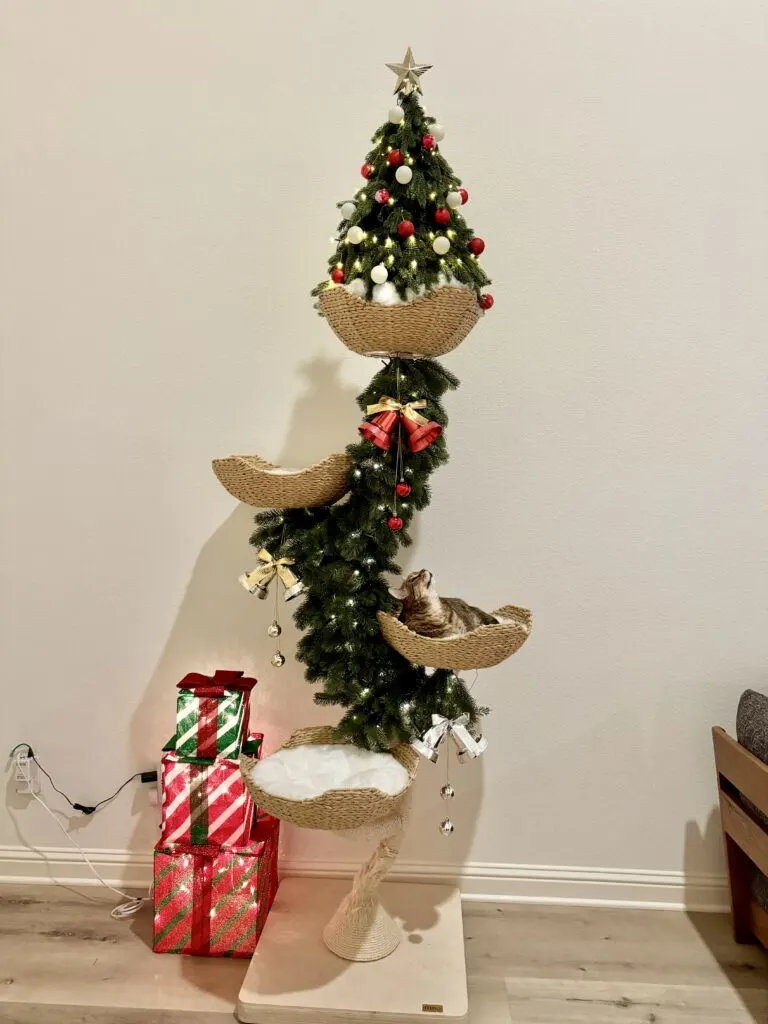
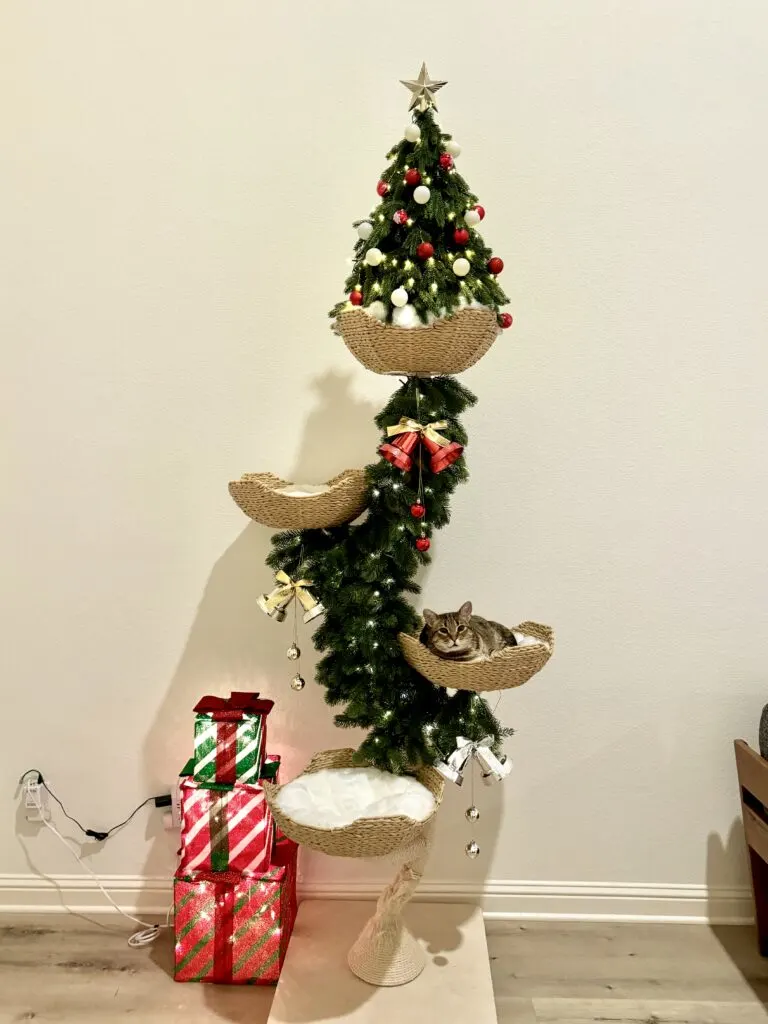
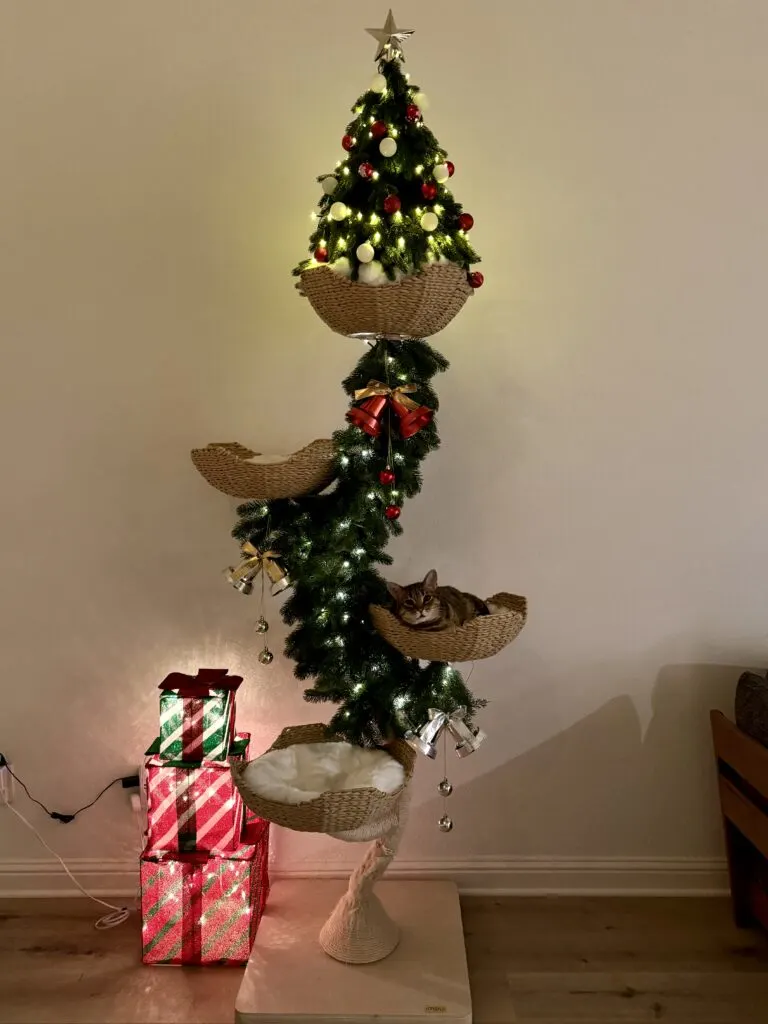
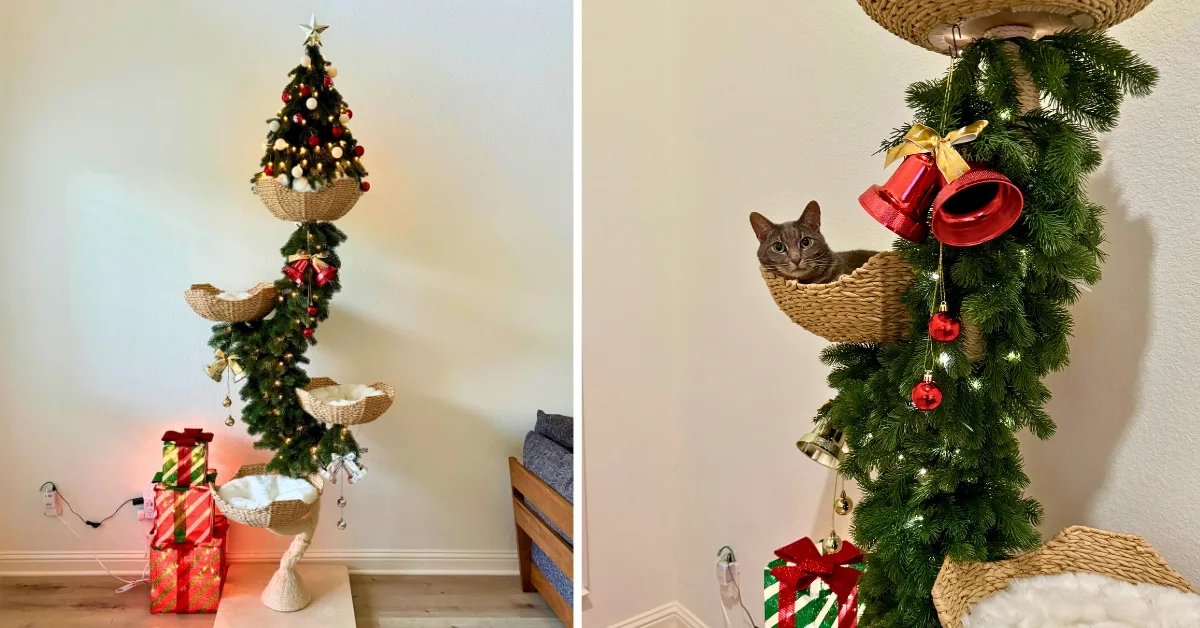
If you have the right kind of cat tree and adult cats with predictably decent behavior, you may be a good candidate to decorate your cat tree for the holidays.
I apologize in advance – this isn’t the most precise guide. I was kind of winging it and it turned out well enough for me to post about.
I decorated my cat tree last year too, but some of the supplies I used weren’t very cat-friendly. I felt comfortable doing that because that my cats weren’t really interested in the garland, but but the video I posted got a lot more attention than I anticipated.
I wish I had used safer supplies for the sake of the viewers who didn’t know any better. So this year, I decorated the tree this year with exclusively cat-conscious supplies. Not only is it safer, but it looks a million times better than it did last year.
Notice how I said “cat-conscious” and not “cat-safe”. For the wrong type of cat and the wrong type of cat tree, these supplies and methods aren’t cat-safe.
It’s your responsibility as a cat owner to know your cat’s behavior and habits well enough to determine if this is safe for your cat. Nothing is I describe is full proof, so please be careful.
I’m done yapping, so enjoy and proceed with caution!
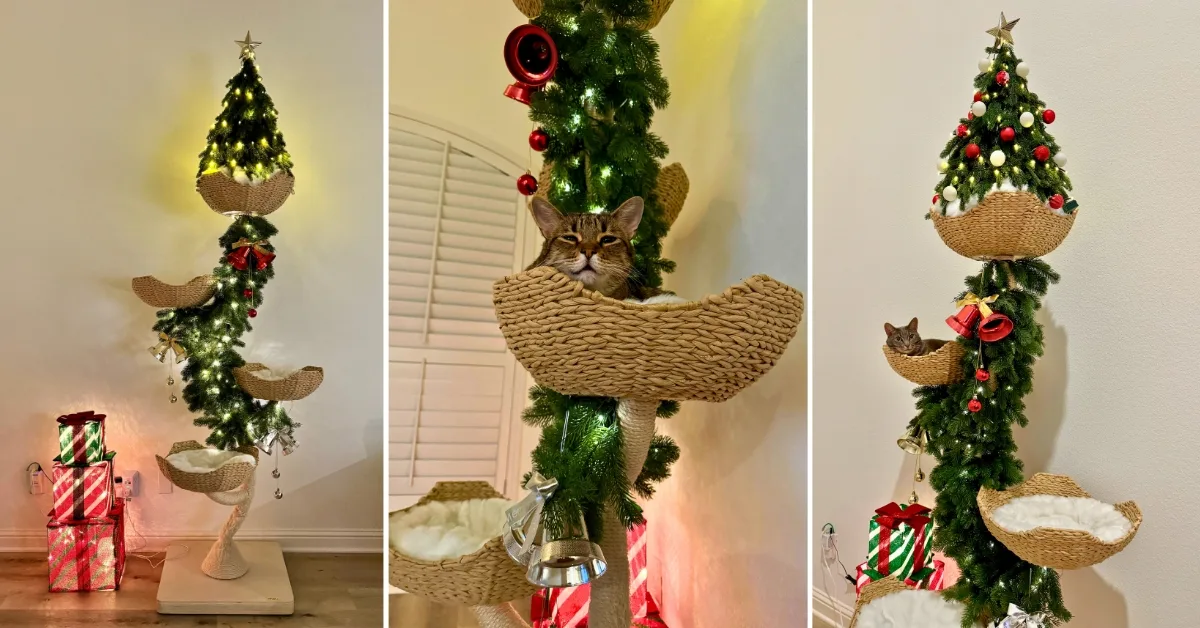
Table of Contents
- CAUTION: Should you decorate your cat tree?
- Choosing Cat-Safe Garland & Decorations
- Tree Trunk Supplies
- Securing The Garland
- Adding Ornaments
- Basket Tree Topper Supplies
- Making The Tree Topper Base
- Adding Branches to Tree Topper
- Prioritizing Your Cat’s Needs
Should you decorate your cat tree?
It’s important to note that most cat trees/scratching posts don’t meet the criteria to be decorated.
It’s more important that your cat has a functional surface to scratch on than for you to have a holiday-themed cat tree.
So if your cat tree doesn’t meet the criteria below, don’t decorate it.
- Your cat tree is very tall
- Your cat only scratches a small portion of the tree
- You have multiple scratching posts
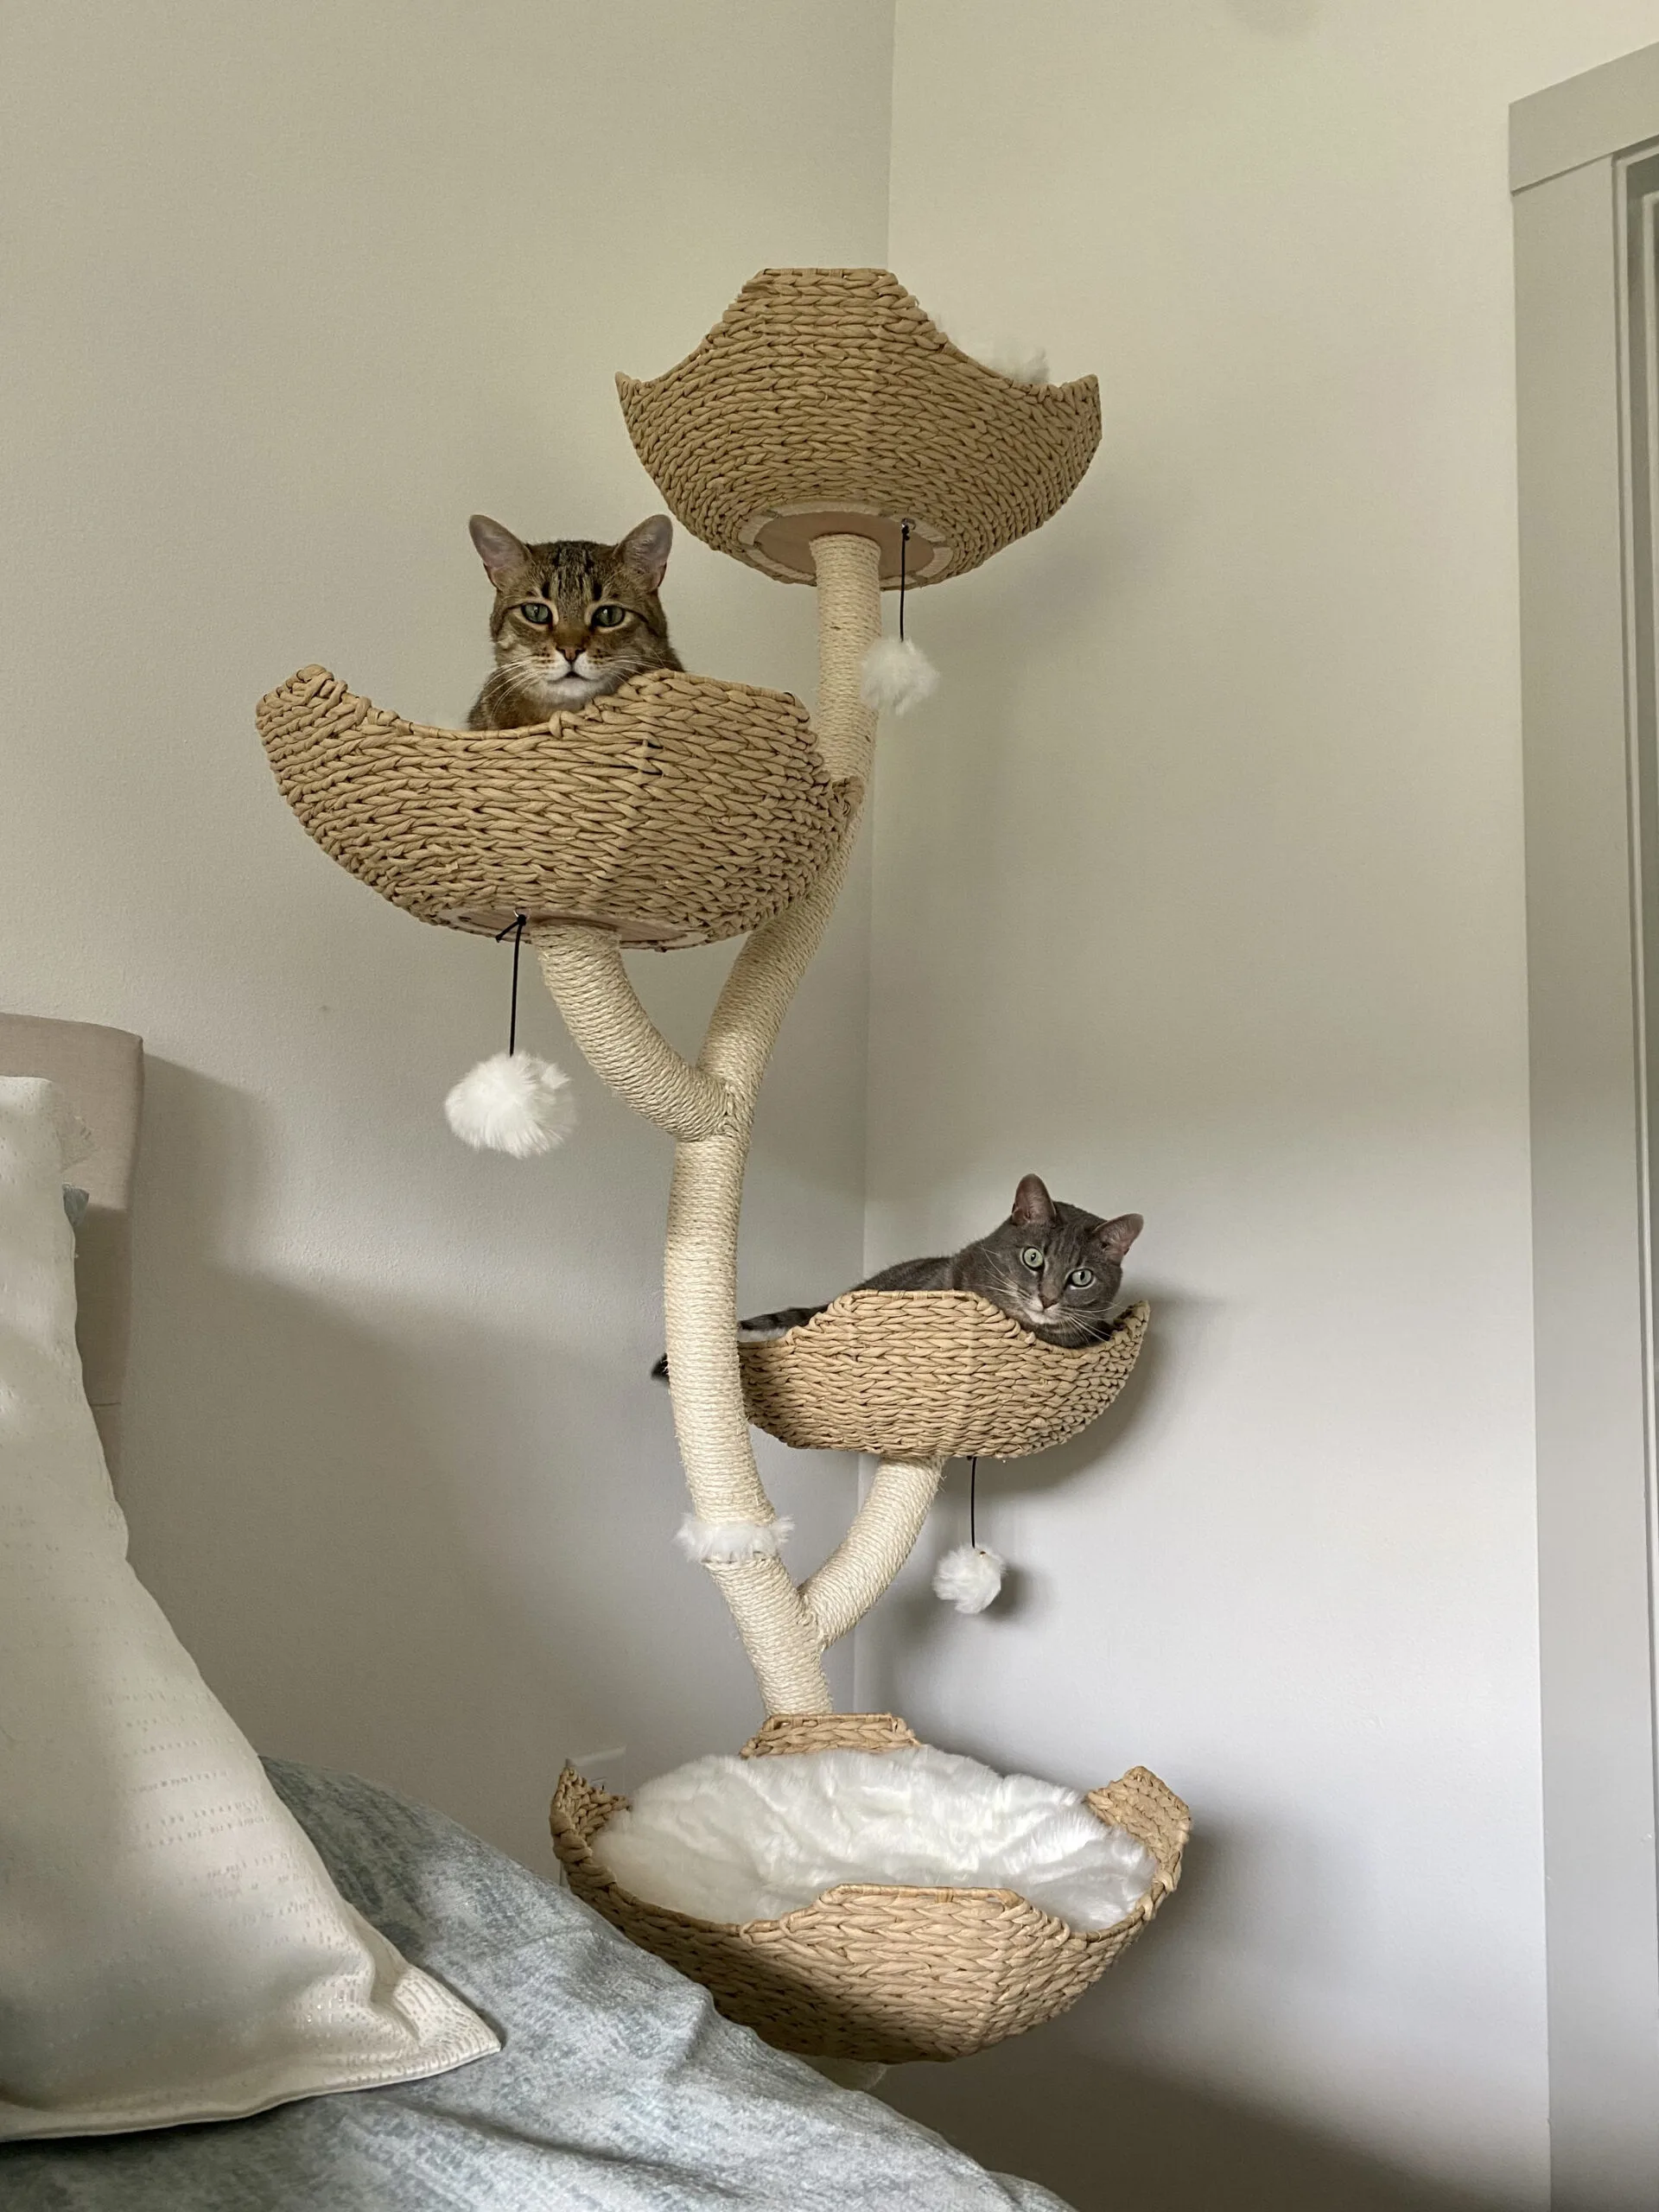
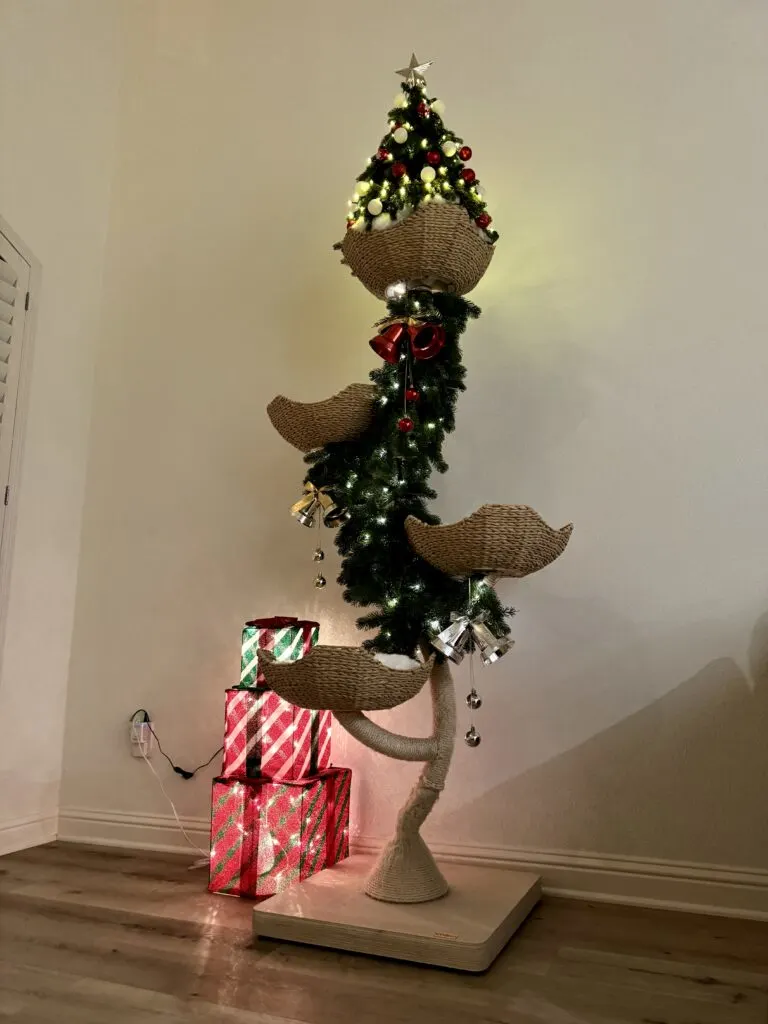
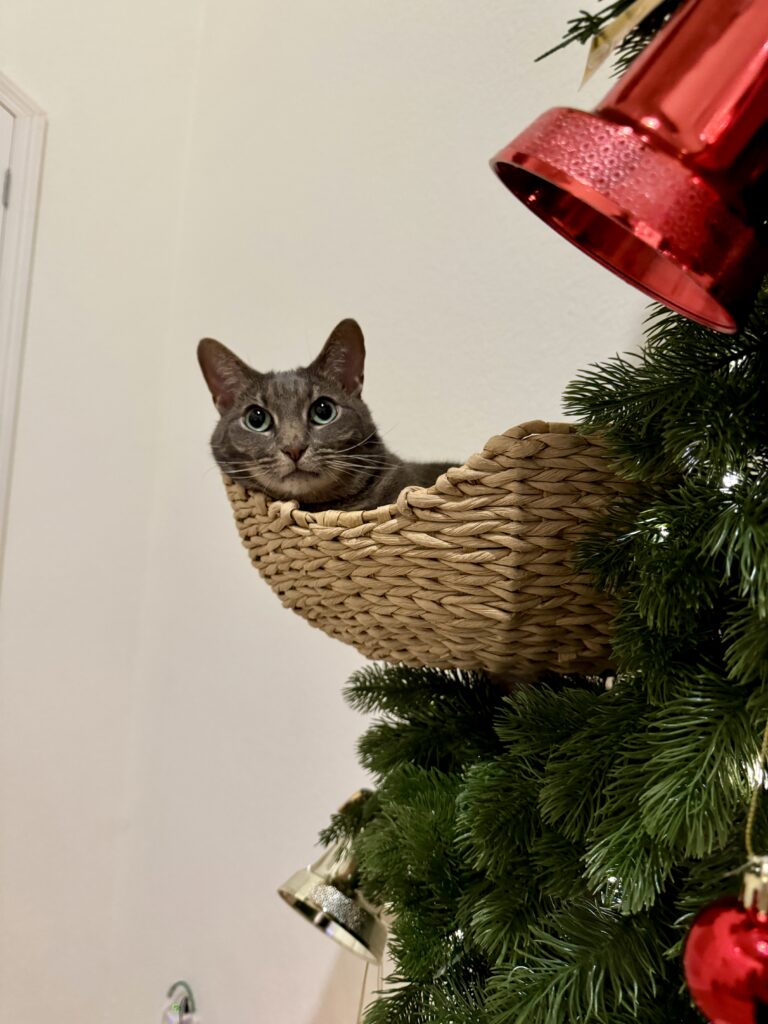
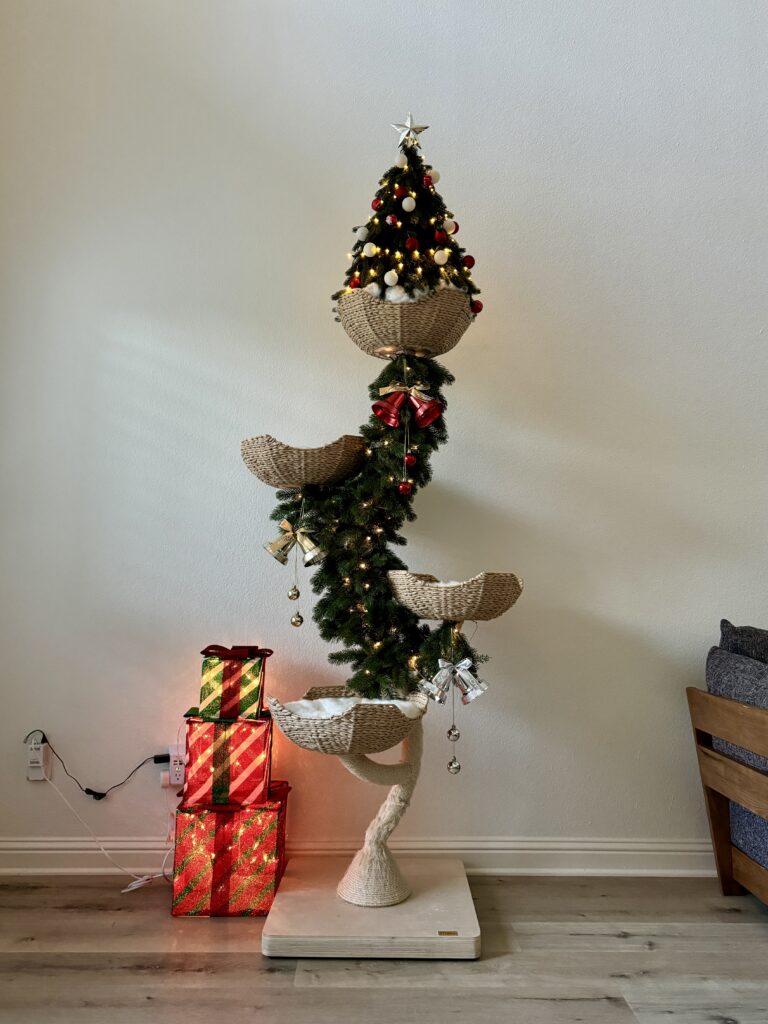
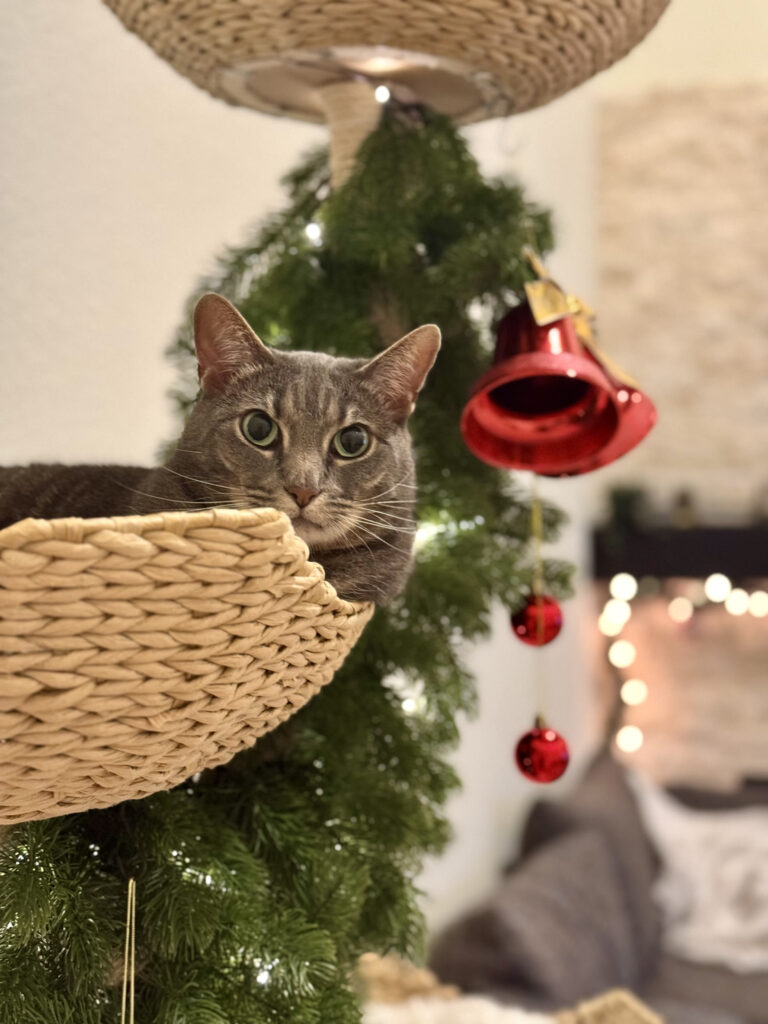
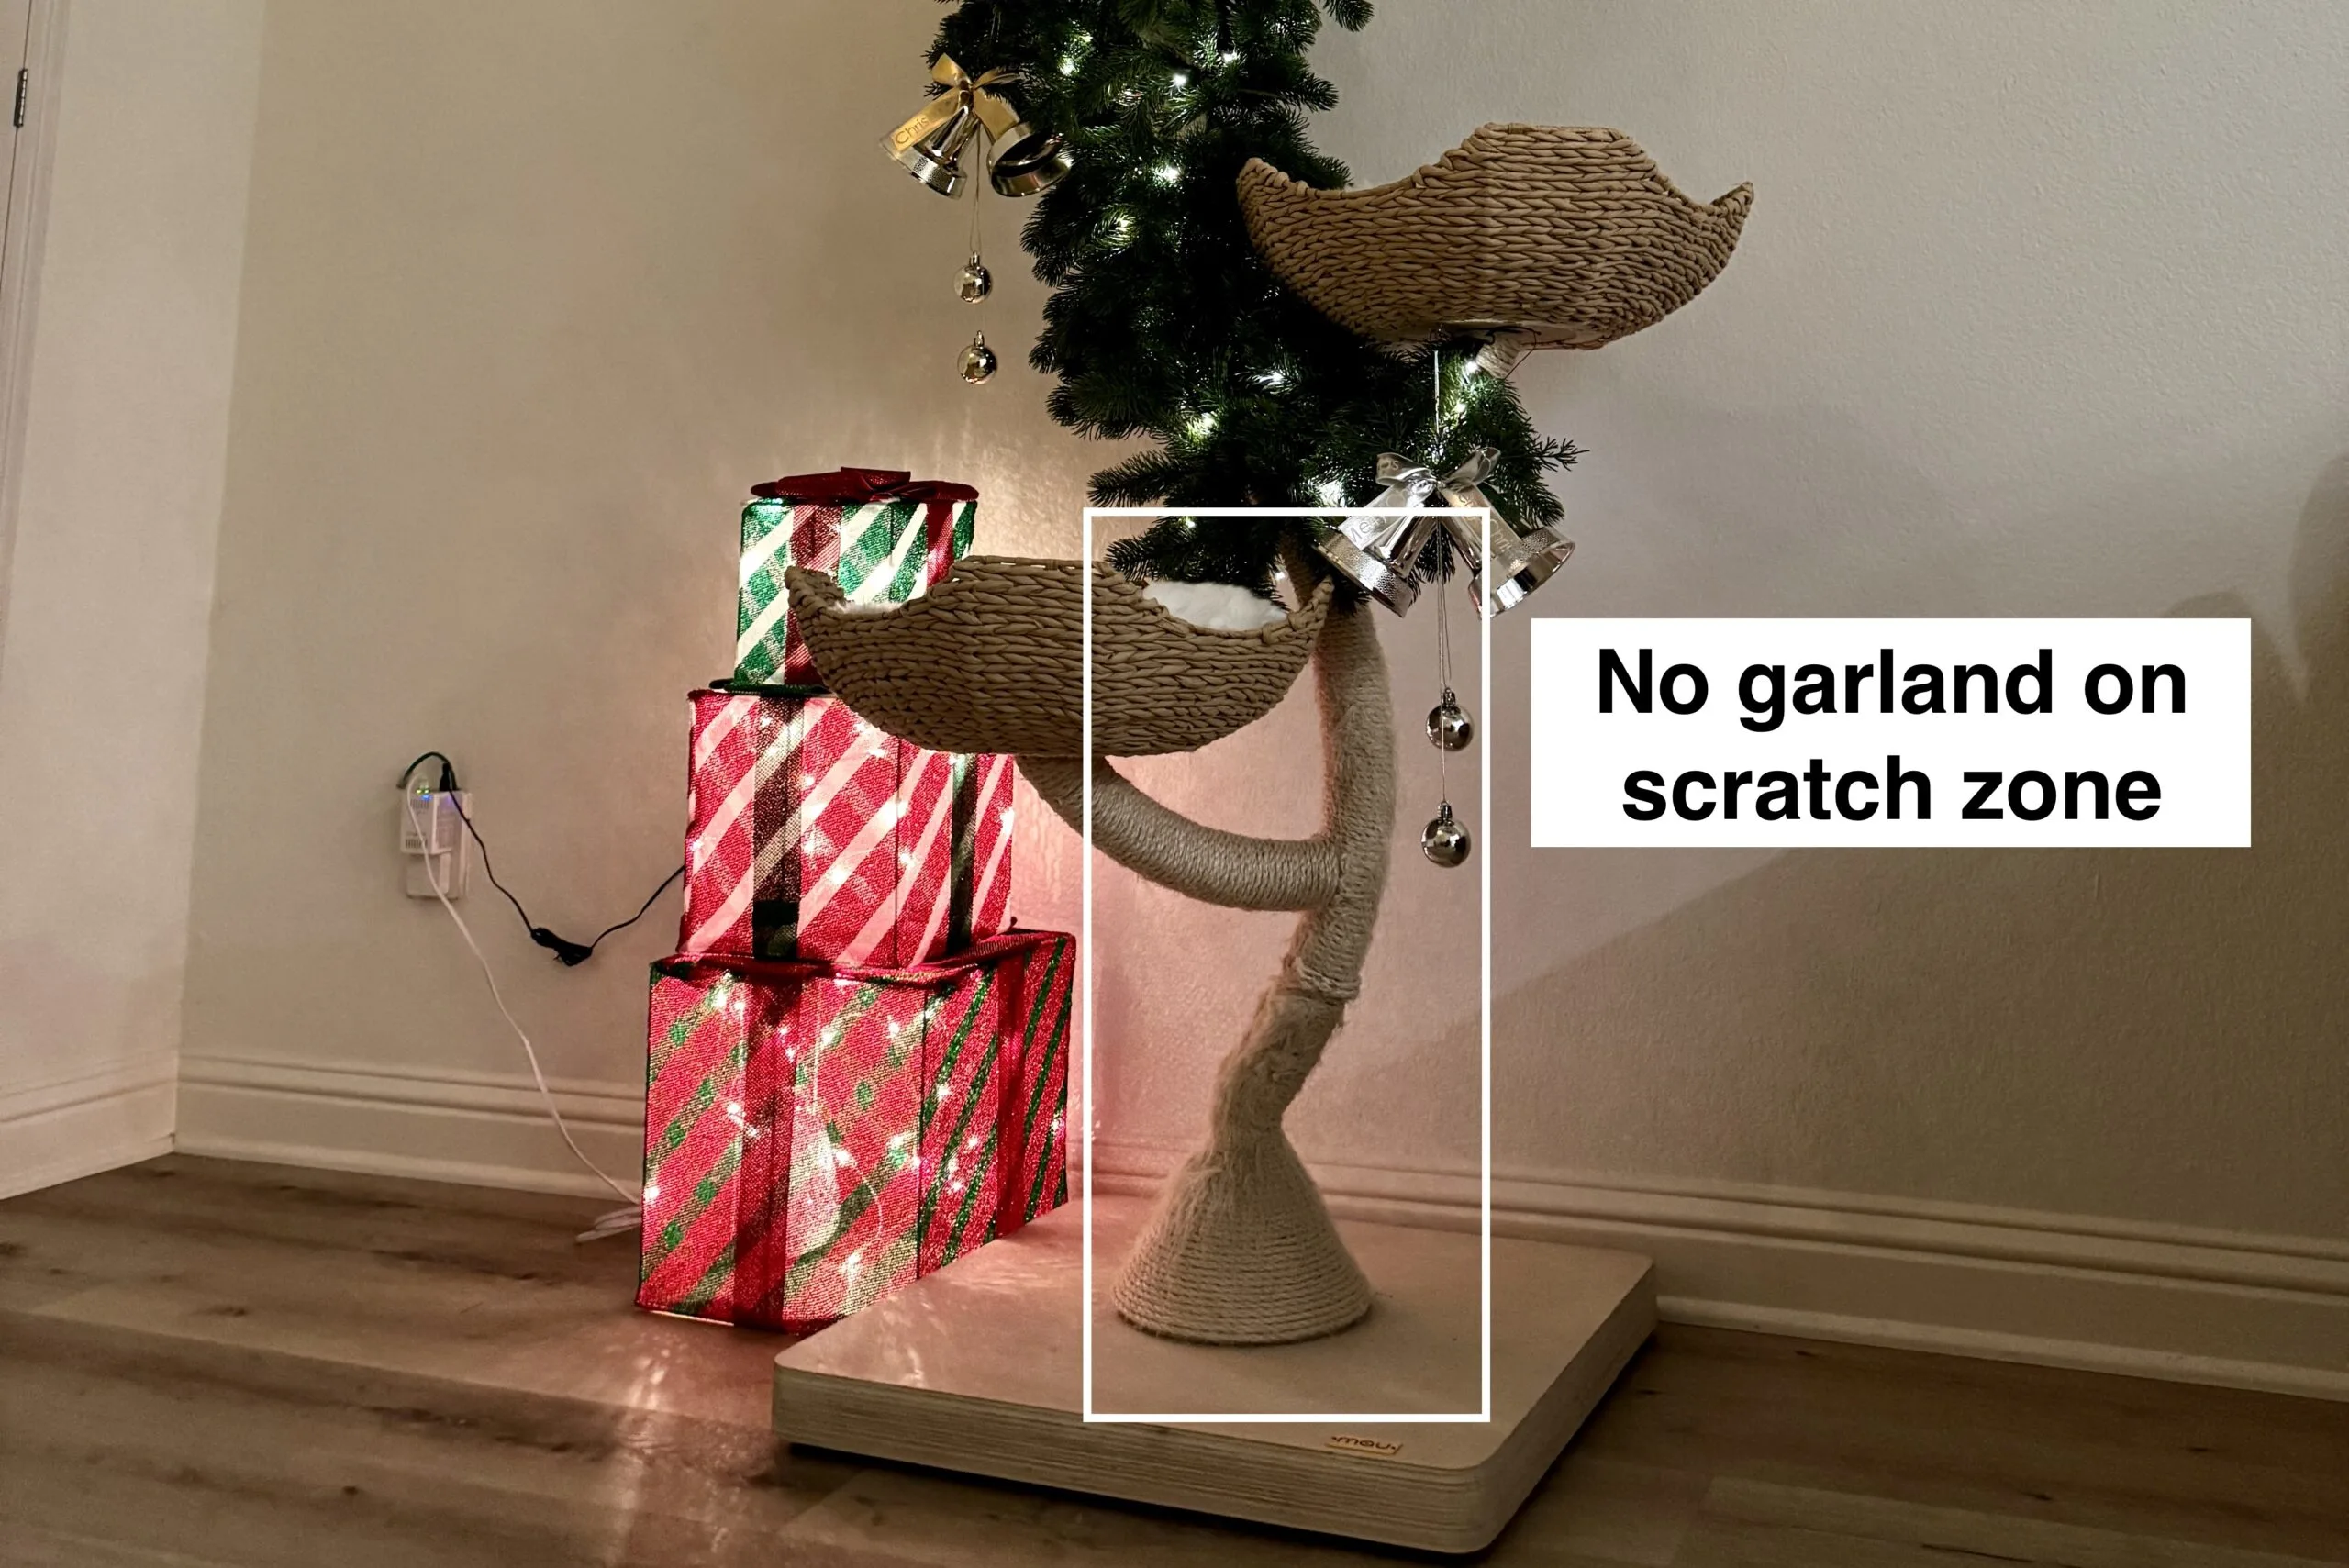
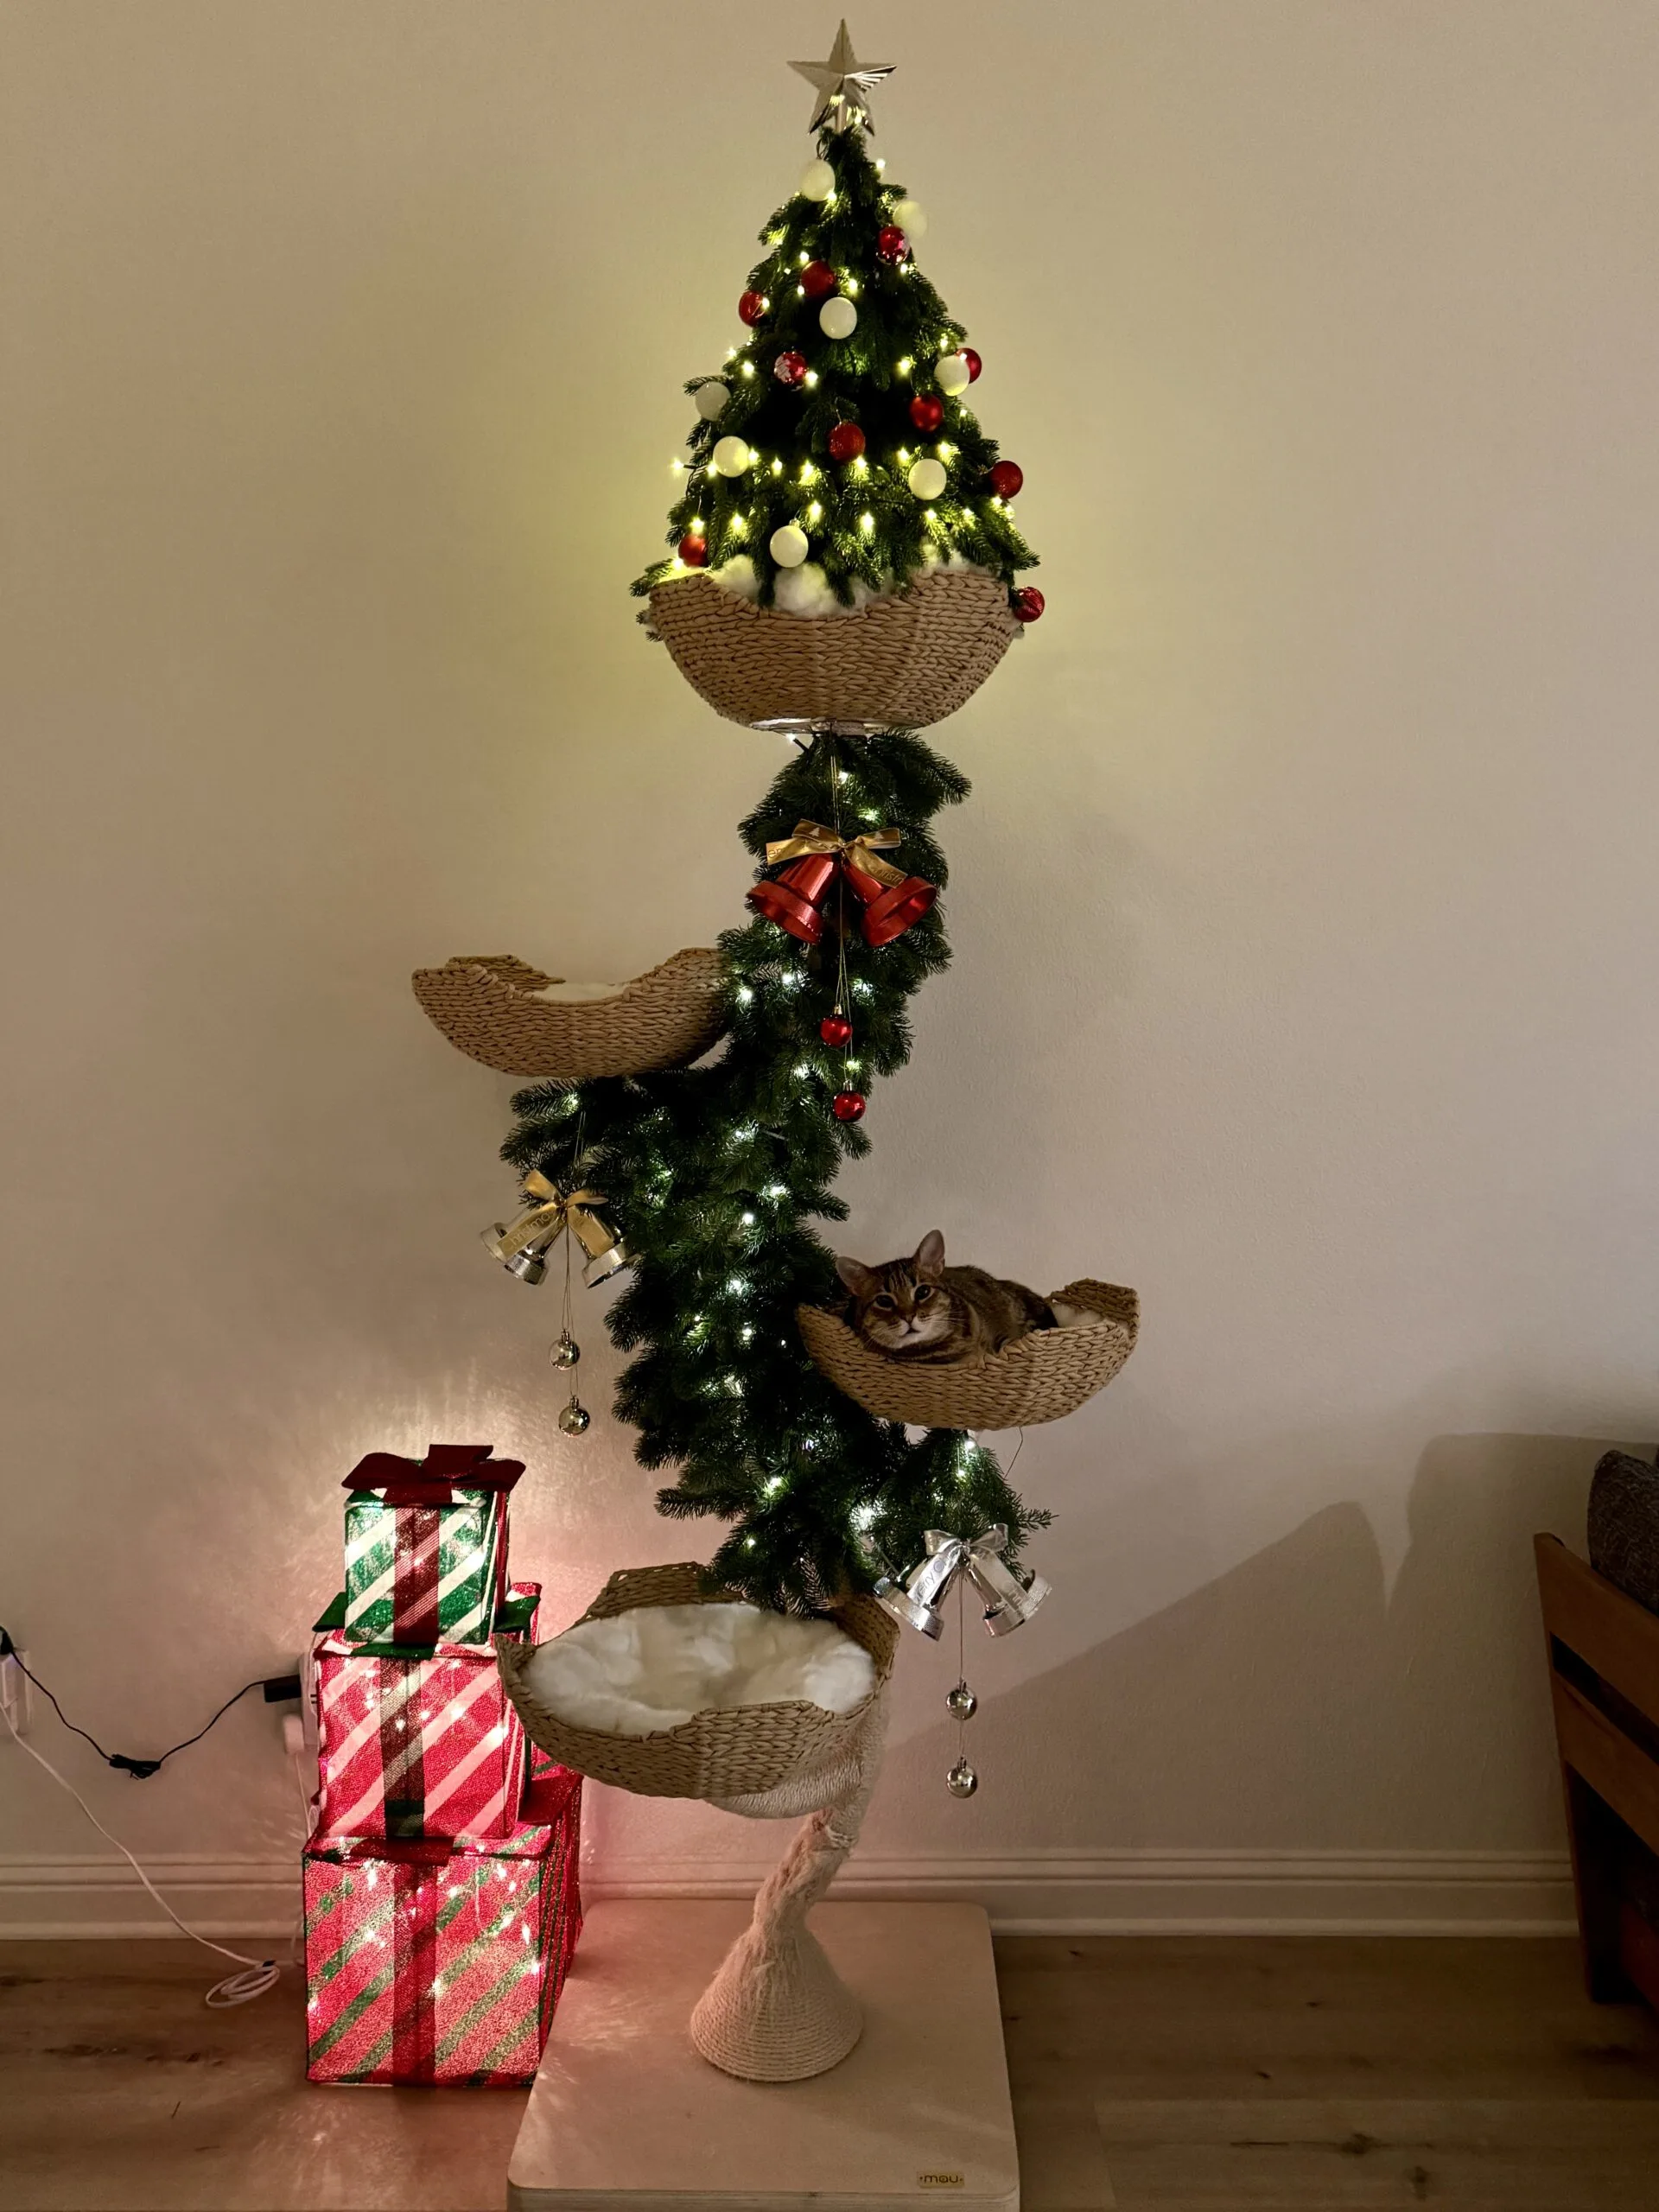
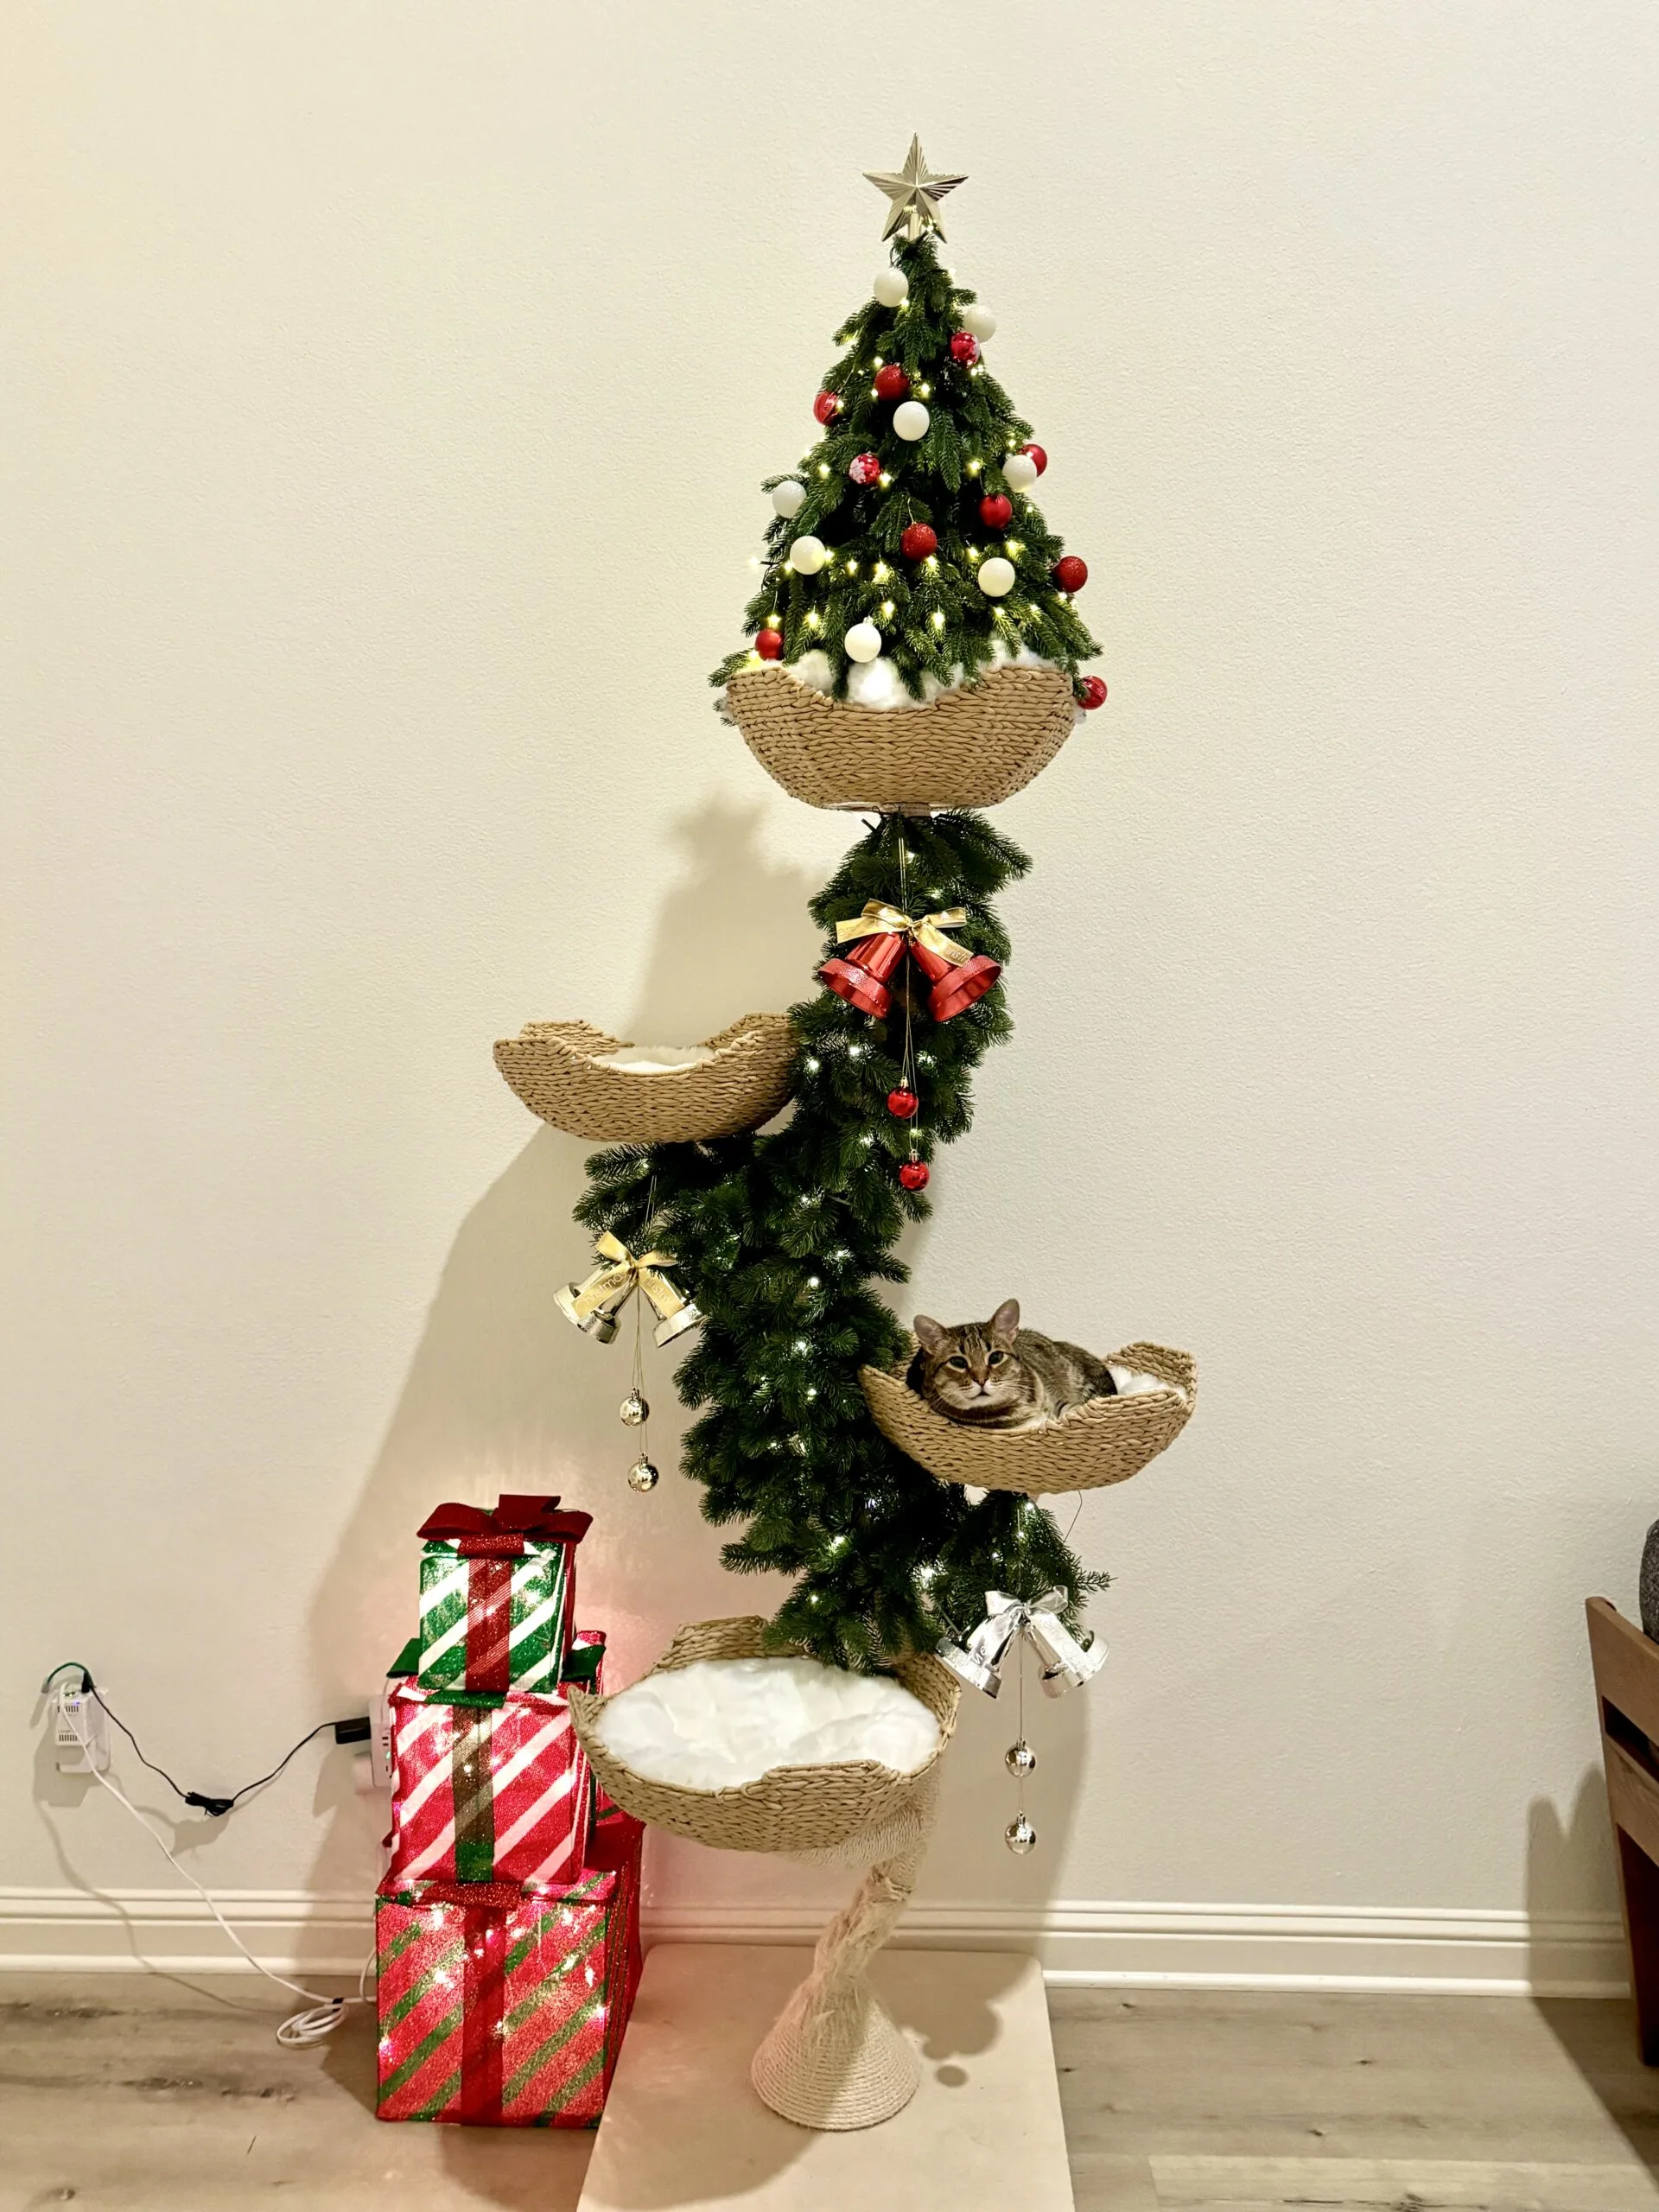
My cat tree is the 73” tall Ivy tree from Mau, however, my cats only scratch roughly 1.5 feet of it near the base. They occasionally sit in the baskets, but never the top basket.
I made sure not to decorate the areas my cats actually scratch. The decorations deliberately started a few inches above the scratch zone.
I also have 2 other cat scratching posts, so they had plenty of options.
For the sake of covering all my bases, here’s some more disclaimers.
- Do NOT decorate your tree if you have a kitten.
- Do NOT decorate your cat tree if your cats are known for chewing/eating things they’re not supposed to.
Choose Cat-Safe Garland & Decorations
It is very important to buy the right kind of garland to prevent choking and fire hazards.
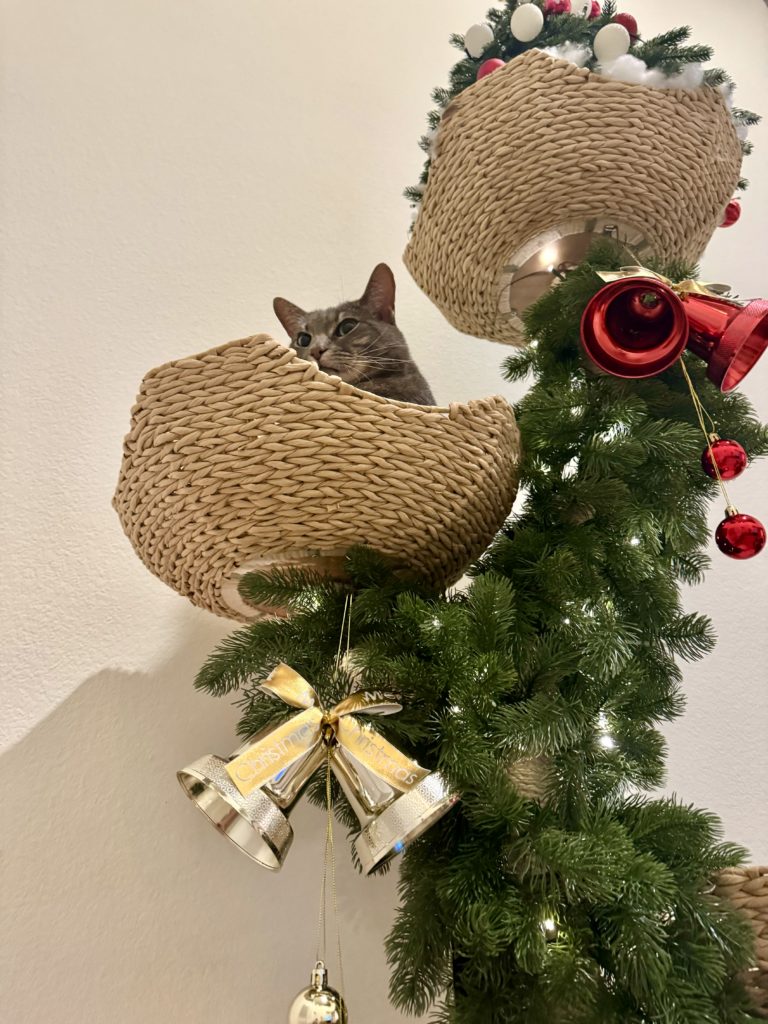
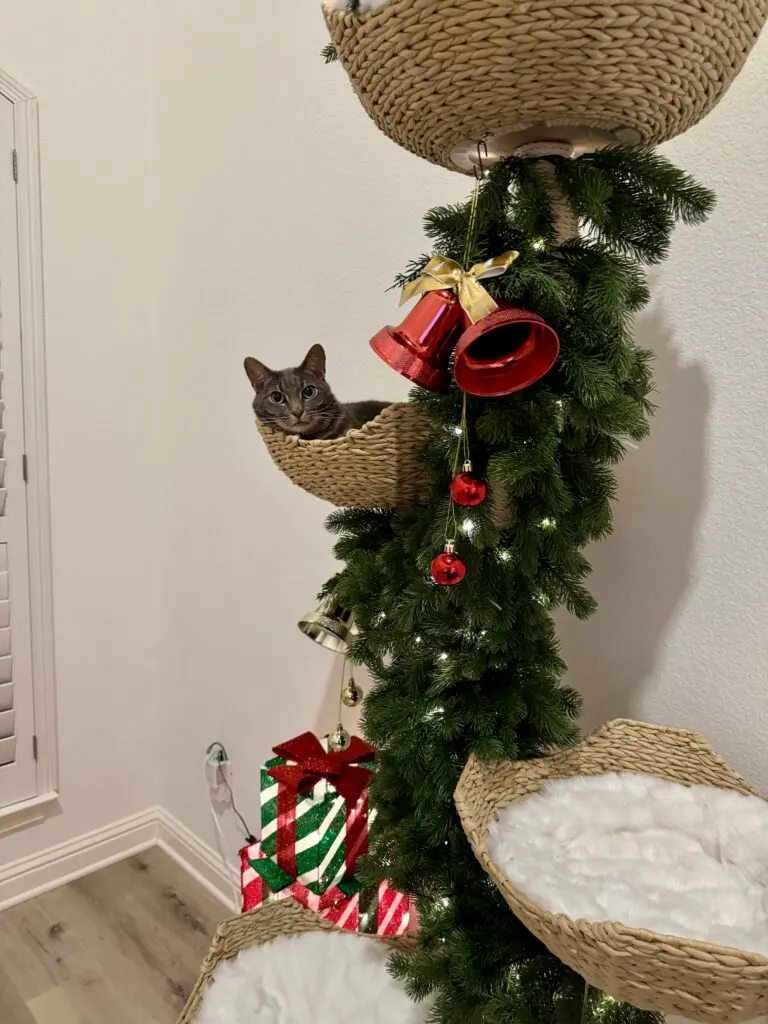
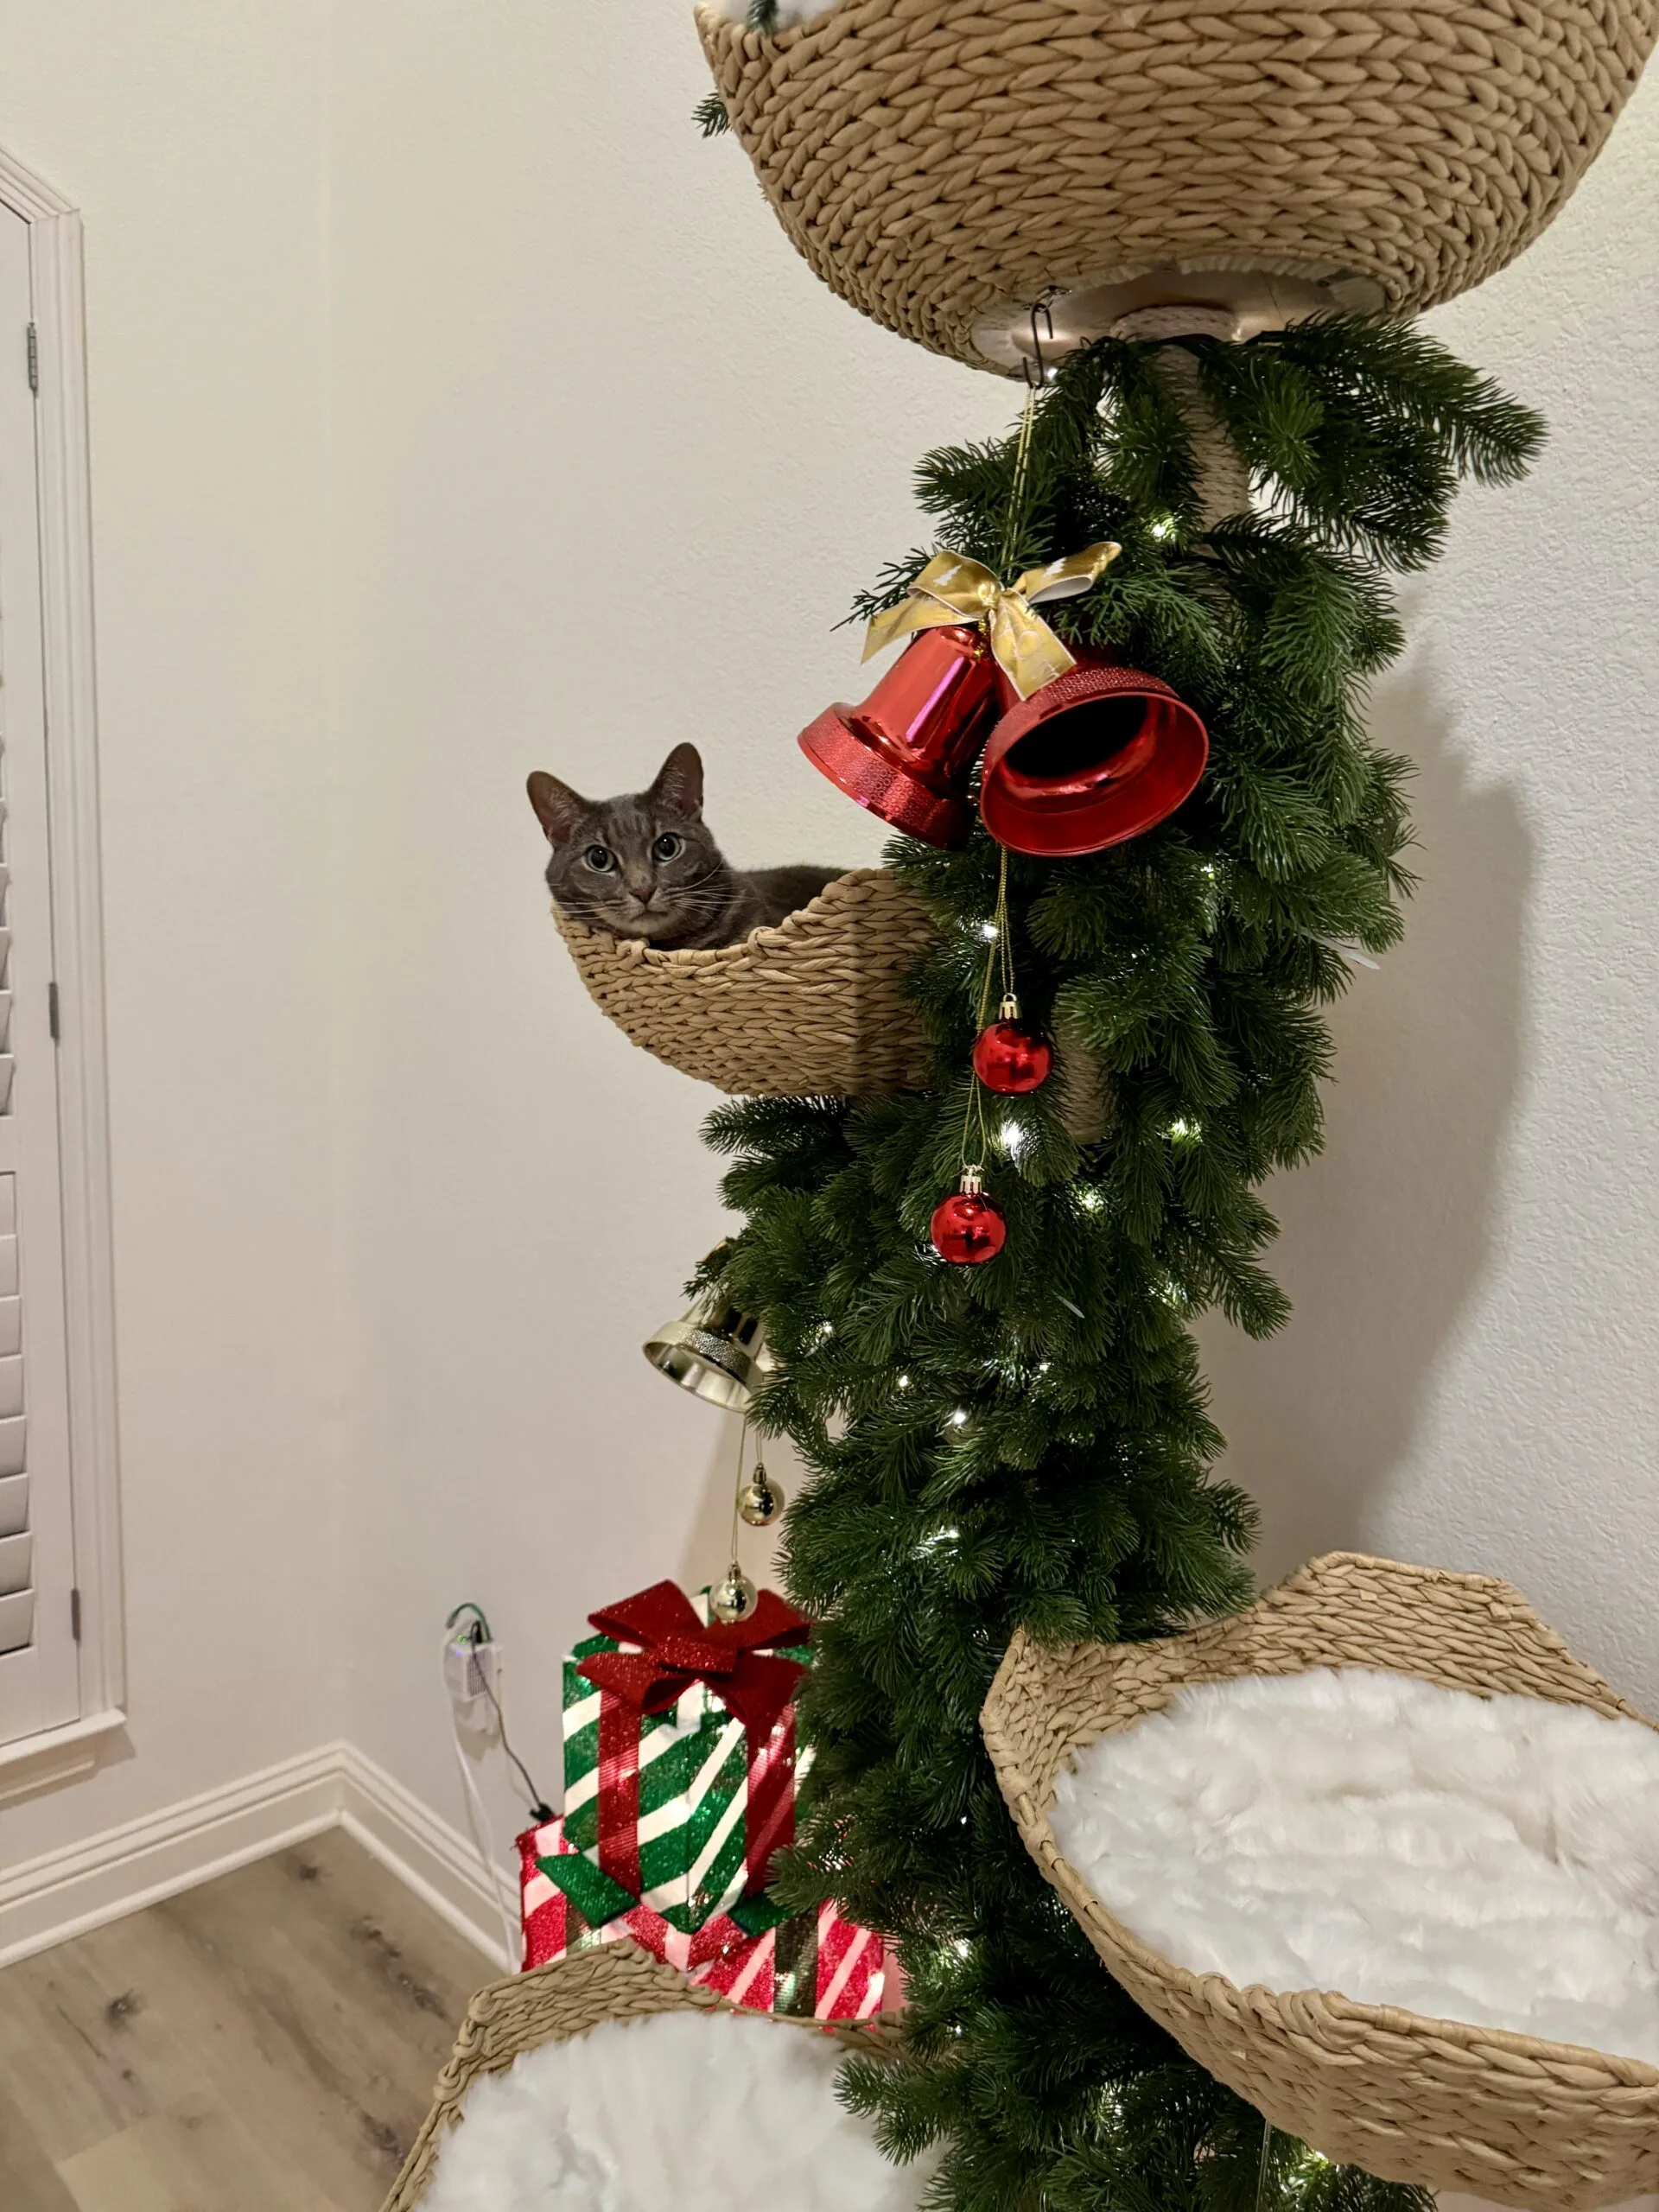
Notice how my garland is made of durable plastic branches attached at the base. If a cat were to bite that and successfully remove it, they’d be removing a piece that’s too large to eat/choke on.
Avoid buying garland made of that stringy, grass-like material that’s essentially several tiny pieces of tinsel glued/woven together. Tinsel is the devil.
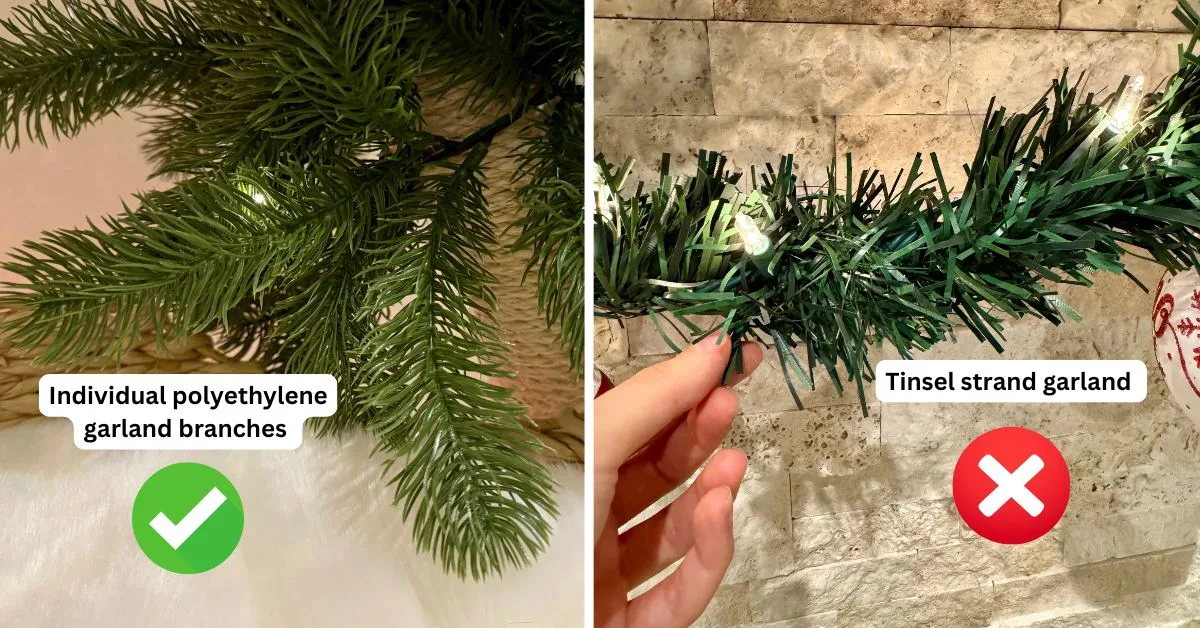
Not only does it shed and unravel easily, but cats love to nibble on it and eat the strands. Those pieces are long and stringy enough to pose a serious risk for life threatening emergency such as choking or a linear foreign body obstruction.
The polyethylene garland I purchased for this project was a lot more expensive compared to the tinsel garland variety, but it’s well worth the peace of mind (not to mention it just looks better).
Tree Trunk Decoration Supplies
Below is a breakdown of all decorations used for decorating the tree trunk.
- x2 battery powered 6 ft pieces of pre-lit, polyethylene garland from Amazon: $40 each
- They come with a variety of color settings!
- Three soundless bells from Daiso (or any shatterproof ornaments): $1.75 each
- 12 inch transparent zip ties from Amazon: $4.79
For those of you wondering what Daiso is, it’s like a Japanese dollar general. If you don’t have a Daiso, check out your local dollar general.
Some people may only want to decorate the trunk, so the mini Christmas tree on the top basket has its own list of supplies and instructions in a separate section.
However, here’s the Amazon list containing most supplies for both the tree trunk and topper decorations (not including the plant pot and other supplies I already had).
Additionally, make sure your decorations are non-flammable and that your lighting is battery powered and comes with a timer.
Battery powered lights operate at low voltage and carry a lower risk of electrocution compared to plug-in lighting.
You’ll notice in my pictures that I have presents stacked up next to the tree that are plugged in – these were primarily featured to hide the Google fiber box and wires. The presents were unplugged after the photos were taken.
Securing The Garland
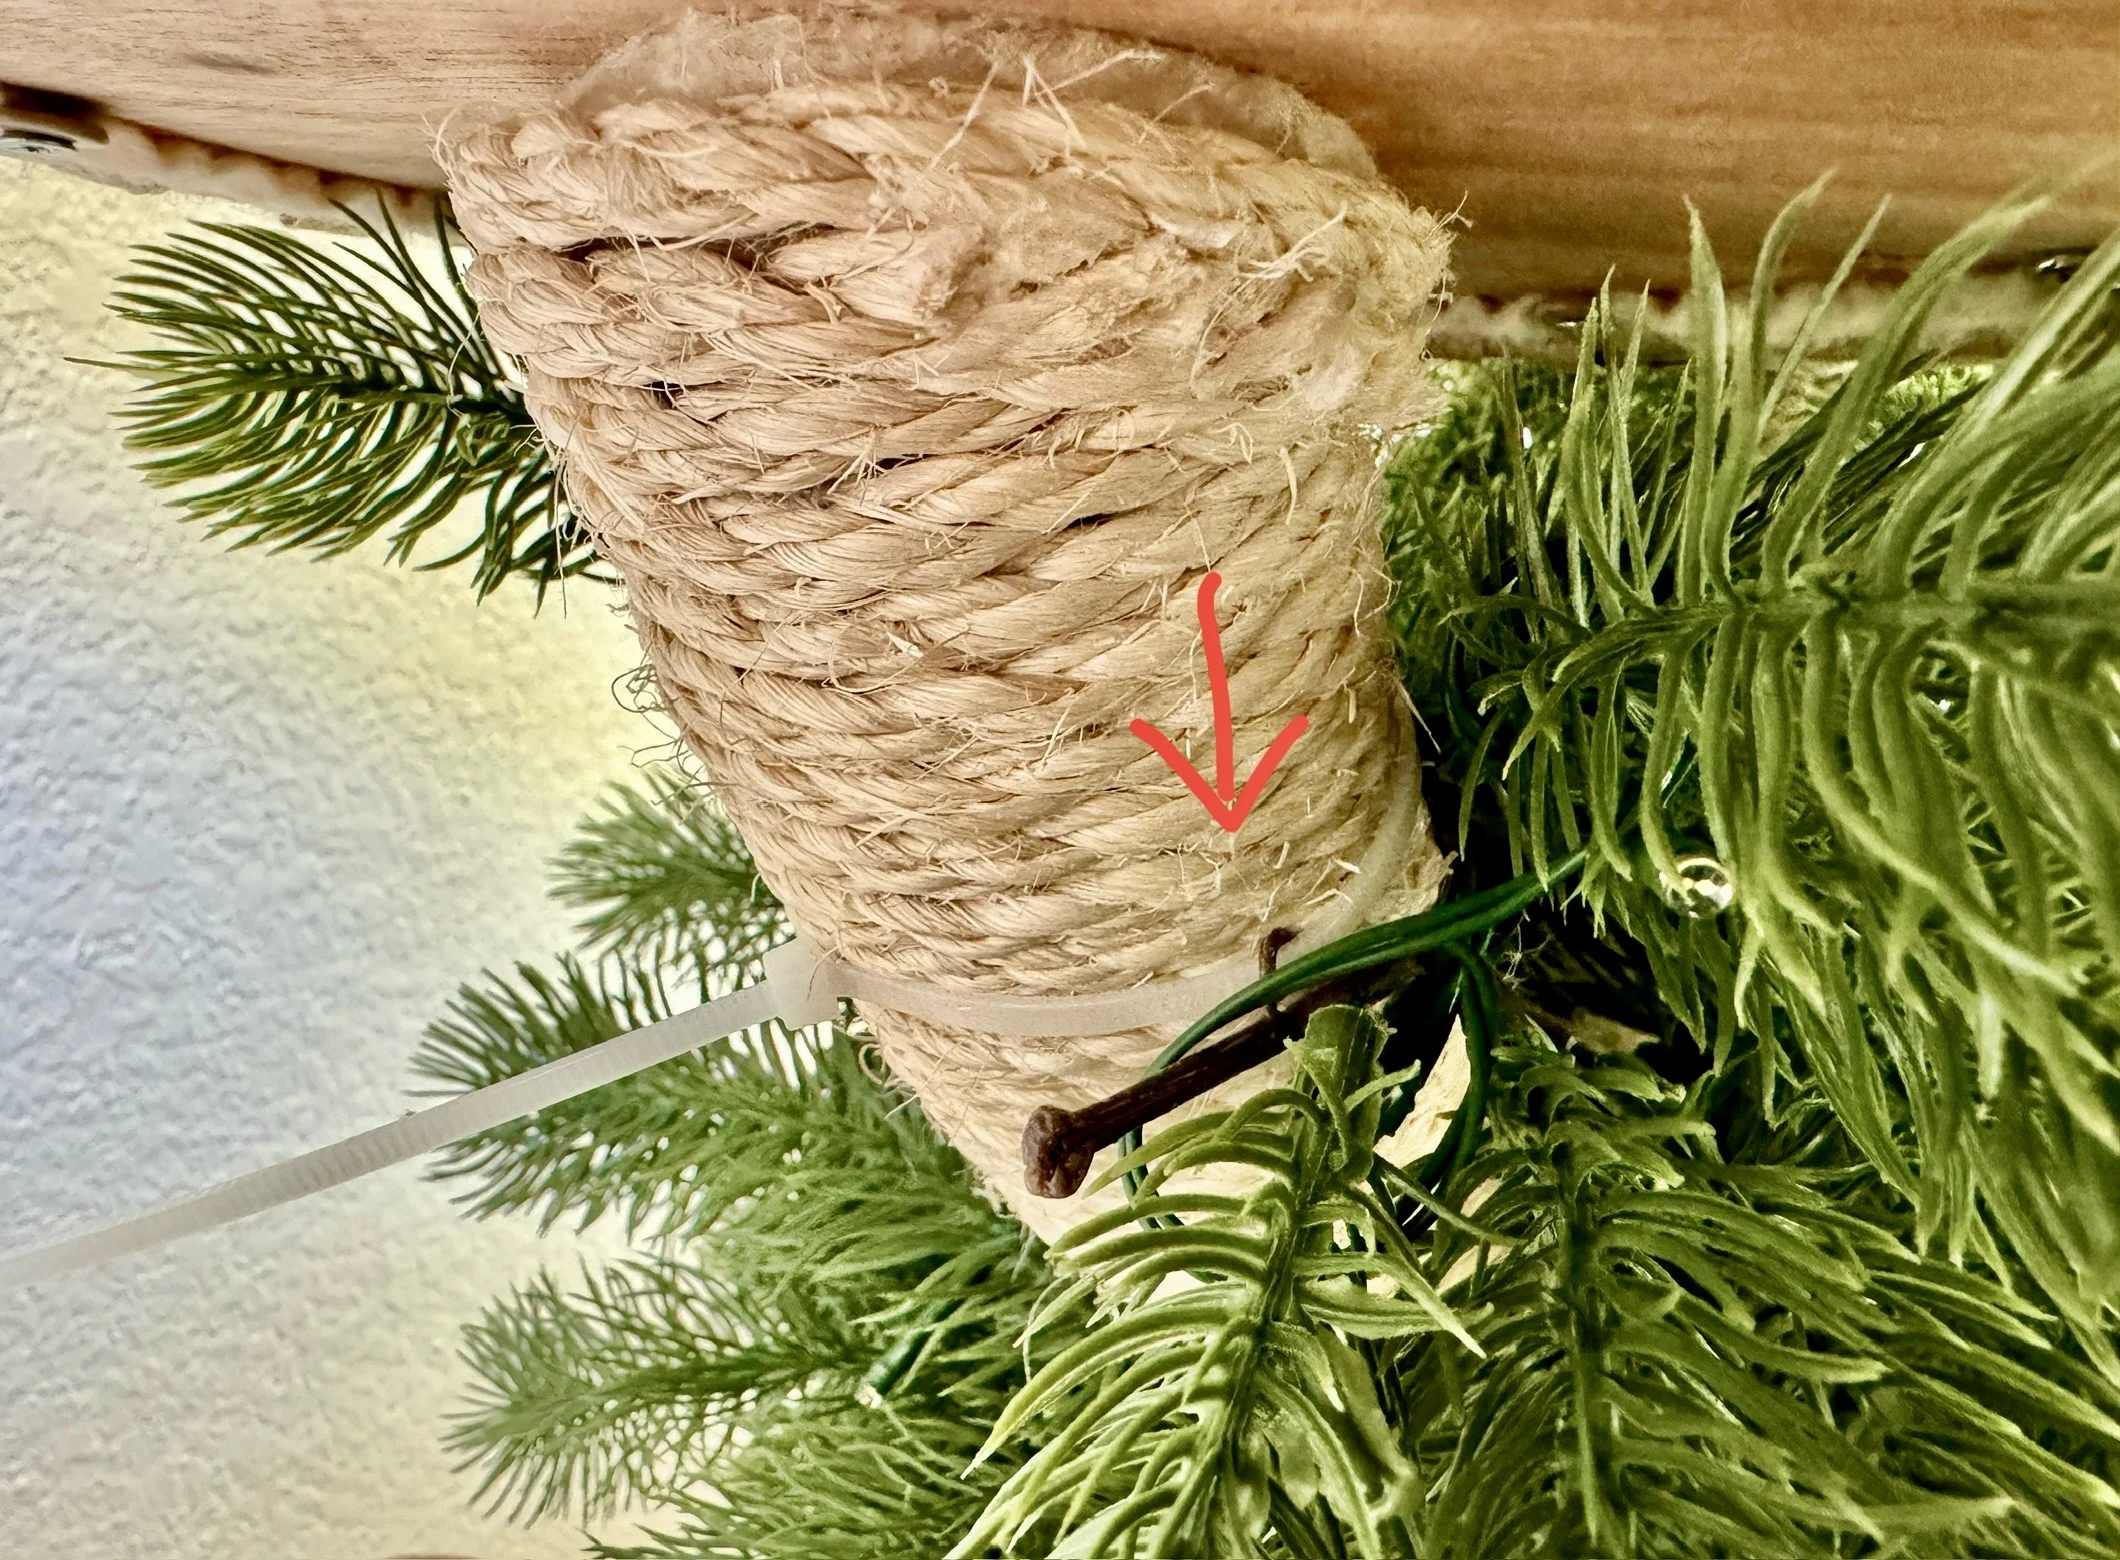
To secure the garland to the cat tree, use zip ties long enough to wrap around the trunk.
Start at the top of your tree and work your way down. Remember to leave the areas your cat scratches exposed – do not obstruct the scratch zone.
There isn’t an exact science for where to put your zip ties. Definitely use them where the garland stops and ends, but also anywhere else you think could use the support. I used 8-10 in total.
The garland had tiny loops throughout it, so I looped the zip ties through wherever it was available.
Adding Ornaments
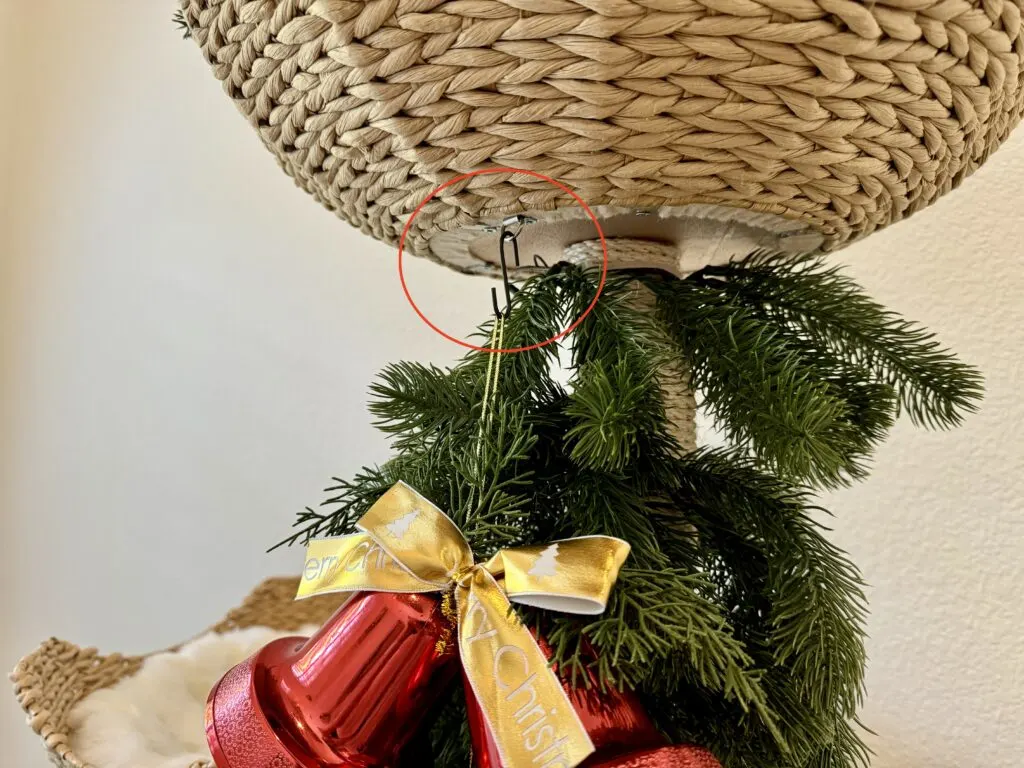
I bought some soundless bells from Daiso for $1.75 each and attached them to the baskets with standard ornament hooks.
The Mau tree has a tiny metal ring underneath each basket. I used this as the attachment point for each bell.
Since my cats don’t use the top basket, I did wanted to add something to the very top to give the tree a unique look.
If you exclusively want to decorate your tree trunk, you can stop reading.
What I ended up doing for the tree topper was a pain in the ass, but I’m going to talk about all the mistakes so it’s easier for you.
Basket Tree Topper Supplies
I decided to put a 2ft Christmas tree in the very top basket. A 3ft or 4ft tree would have been too tall and/or heavy (trust me, I tried).
I was very annoyed to find out that every 2ft Christmas tree online was either ugly, sparse, or obnoxiously expensive.
I had already spent way more than I wanted to on decorations, so I wasn’t about to pay $70 for a tiny Christmas tree that needed to be plugged in the wall and had stringy garland branches.
Instead, I wanted a tree that was full, symmetrical, and battery powered. That meant I had to make my own.
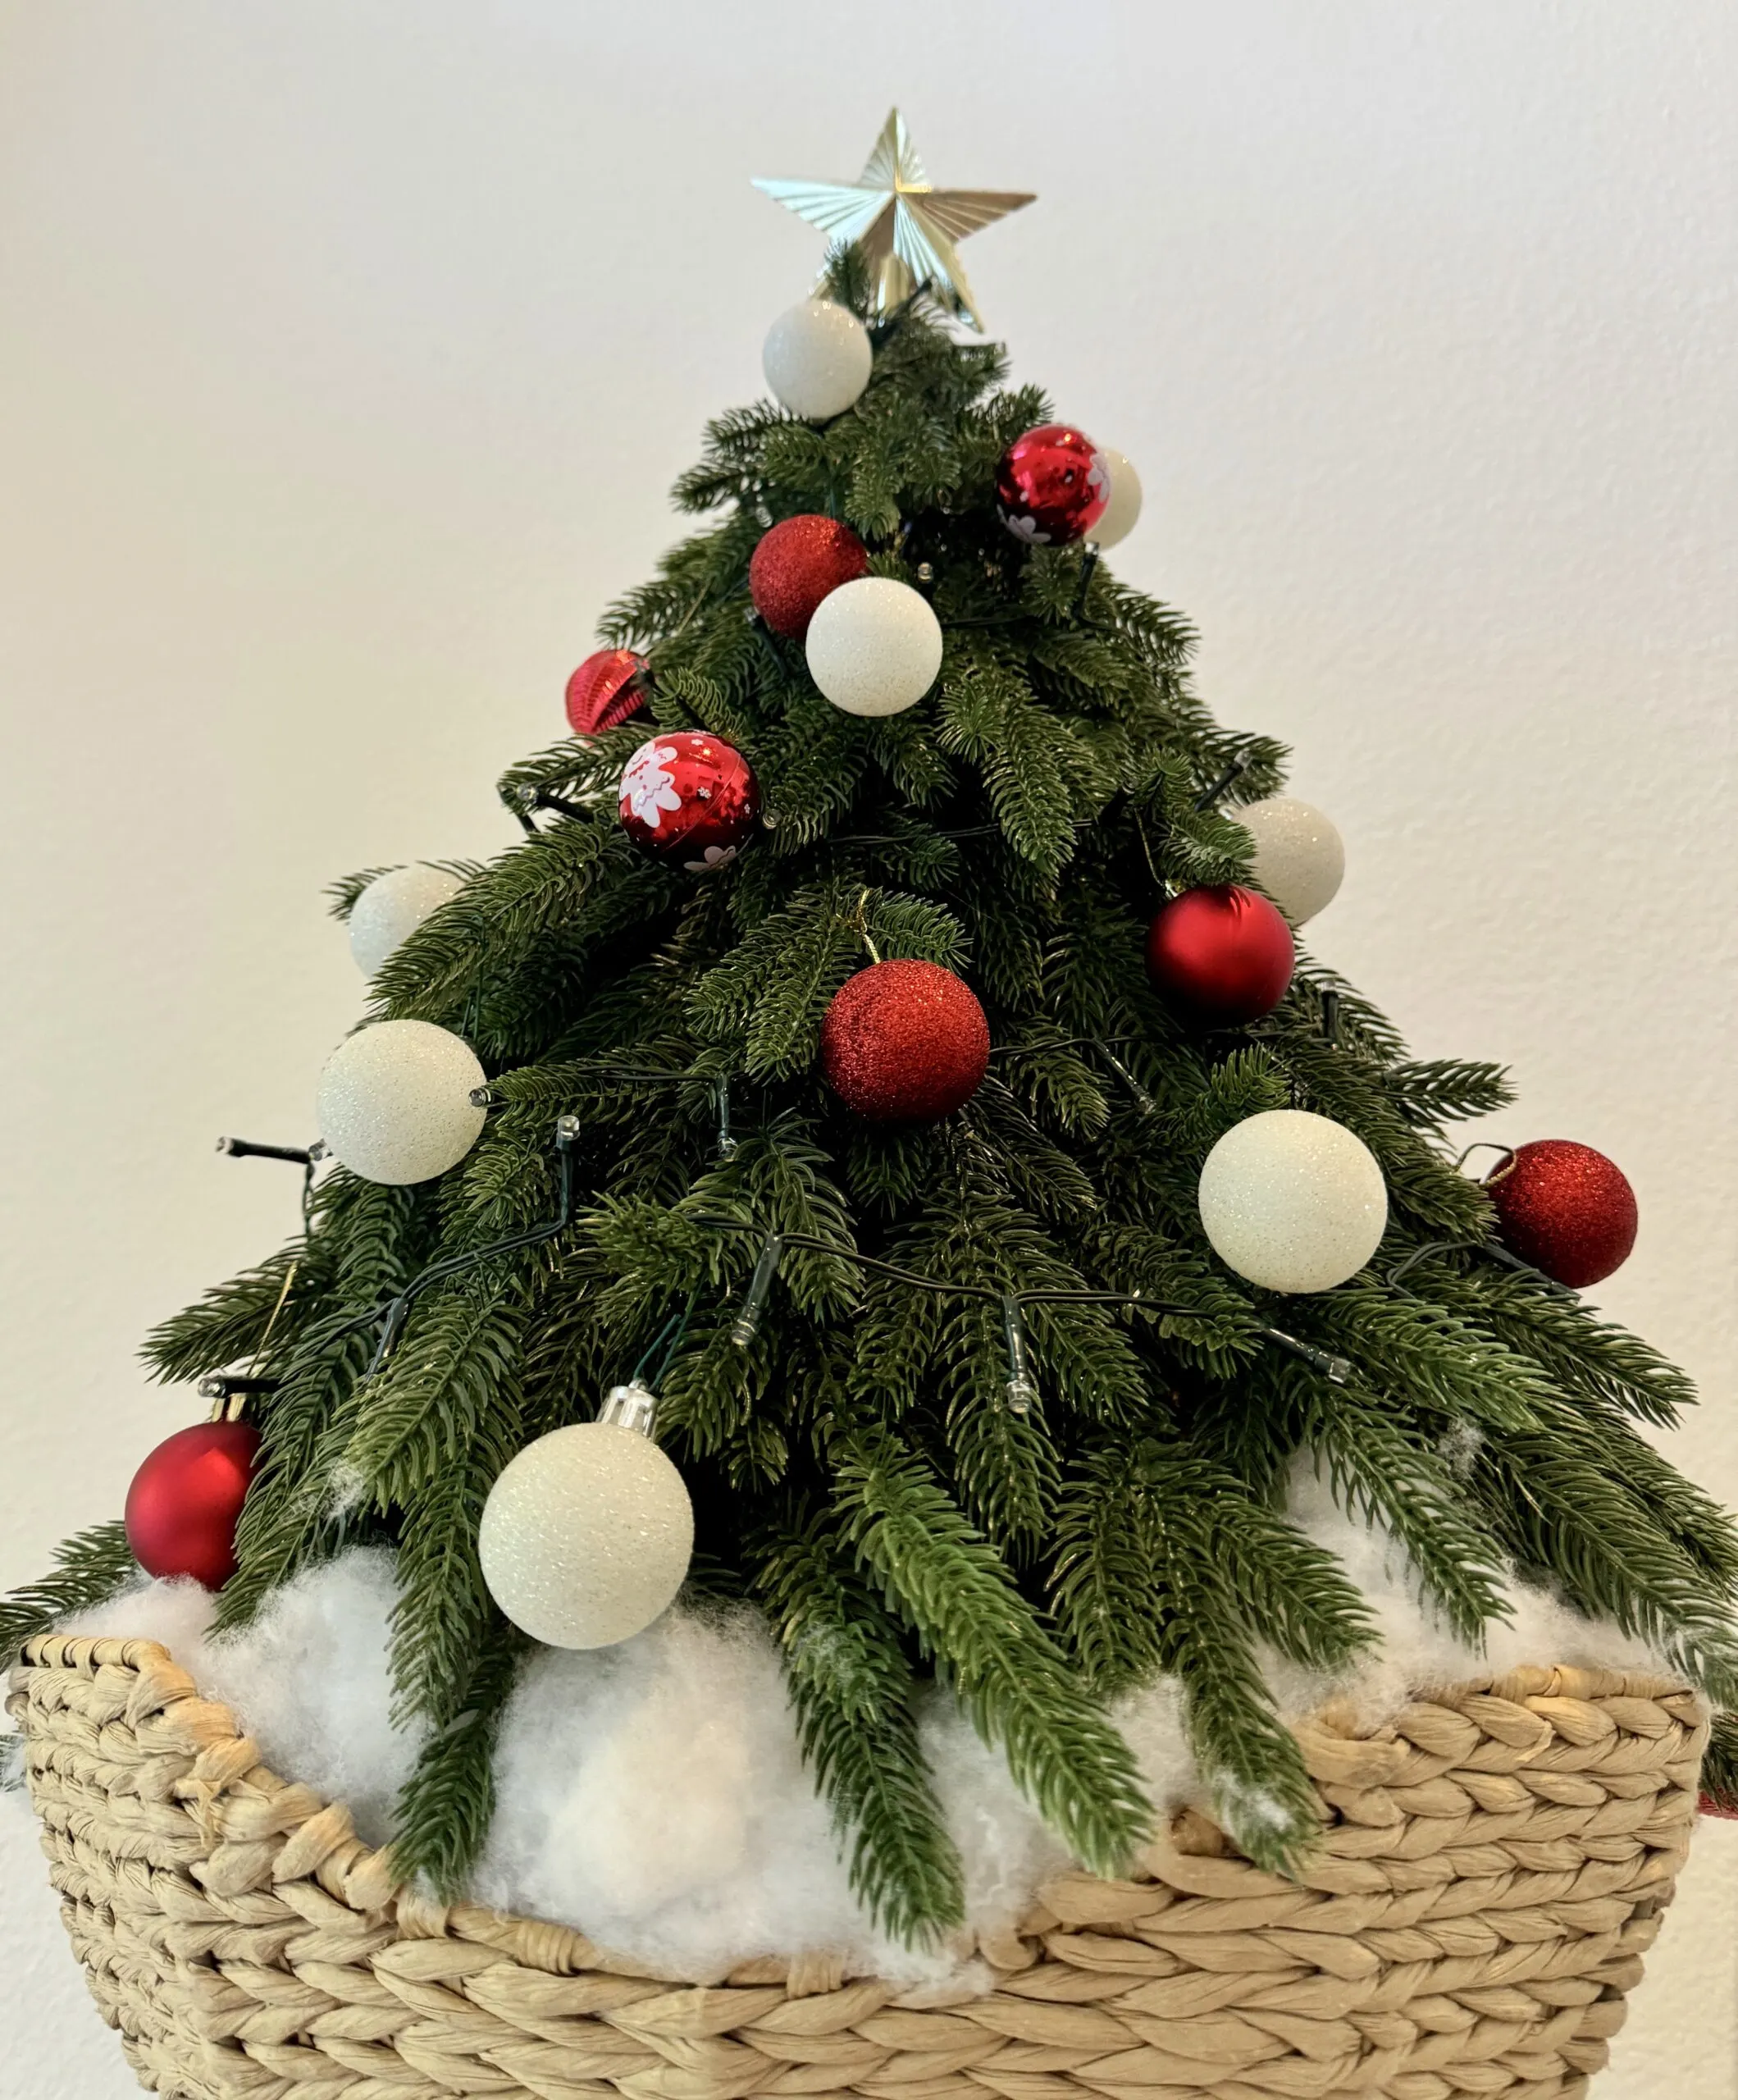
I only bought what was necessary and used other supplies I had laying around. You may find there are better alternatives than what I used, so feel free to get creative.
I didn’t intend on posting this part, so please forgive me for not keeping accurate records of all the supplies and instructions for the tree topper.
Here’s a breakdown of the supplies:
- Circular plant pot (9-11 inches in diameter) from Daiso: $3
- 6 straight 24 inch plant stakes from Daiso: $1.75
- Star topper from Daiso: $1.75
- 100ish individual polyethylene garland branches from Amazon: $16
- 4 inch dark green zip ties from Amazon: $4
- Battery powered Christmas lights from Amazon: $12.50
- Garden netting from Amazon: $12.79 (already had)
- Small shatterproof ornaments: already had
- Rubber bands: already had
- Hot glue gun & sticks: already had
- Rope: already had
- Fake snow from Michael’s: $5
- The kind that feels like cotton so you can tear clumps off
You’re probably doing the math and thinking I should have just bought the $70 tree, but there wasn’t one on the market that checked all my boxes in terms of safety and aesthetics.
I’m really happy with how mine turned out, even though it cost a little less than a pre-made one.
Making The Tree Topper Base
I got a wide plant pot that would fit in the basket. My pot was 13 inches in diameter, but I should have gotten something 10-11 inches wide instead.
This is because finished tree topper ended up being too wide for the basket; so instead of sitting flat in the basket, it’s actually being balanced by the basket edges (whoops).
I started by hot glueing on some rope around the perimeter. I felt like rope was a better surface for adhesion as compared to plastic.
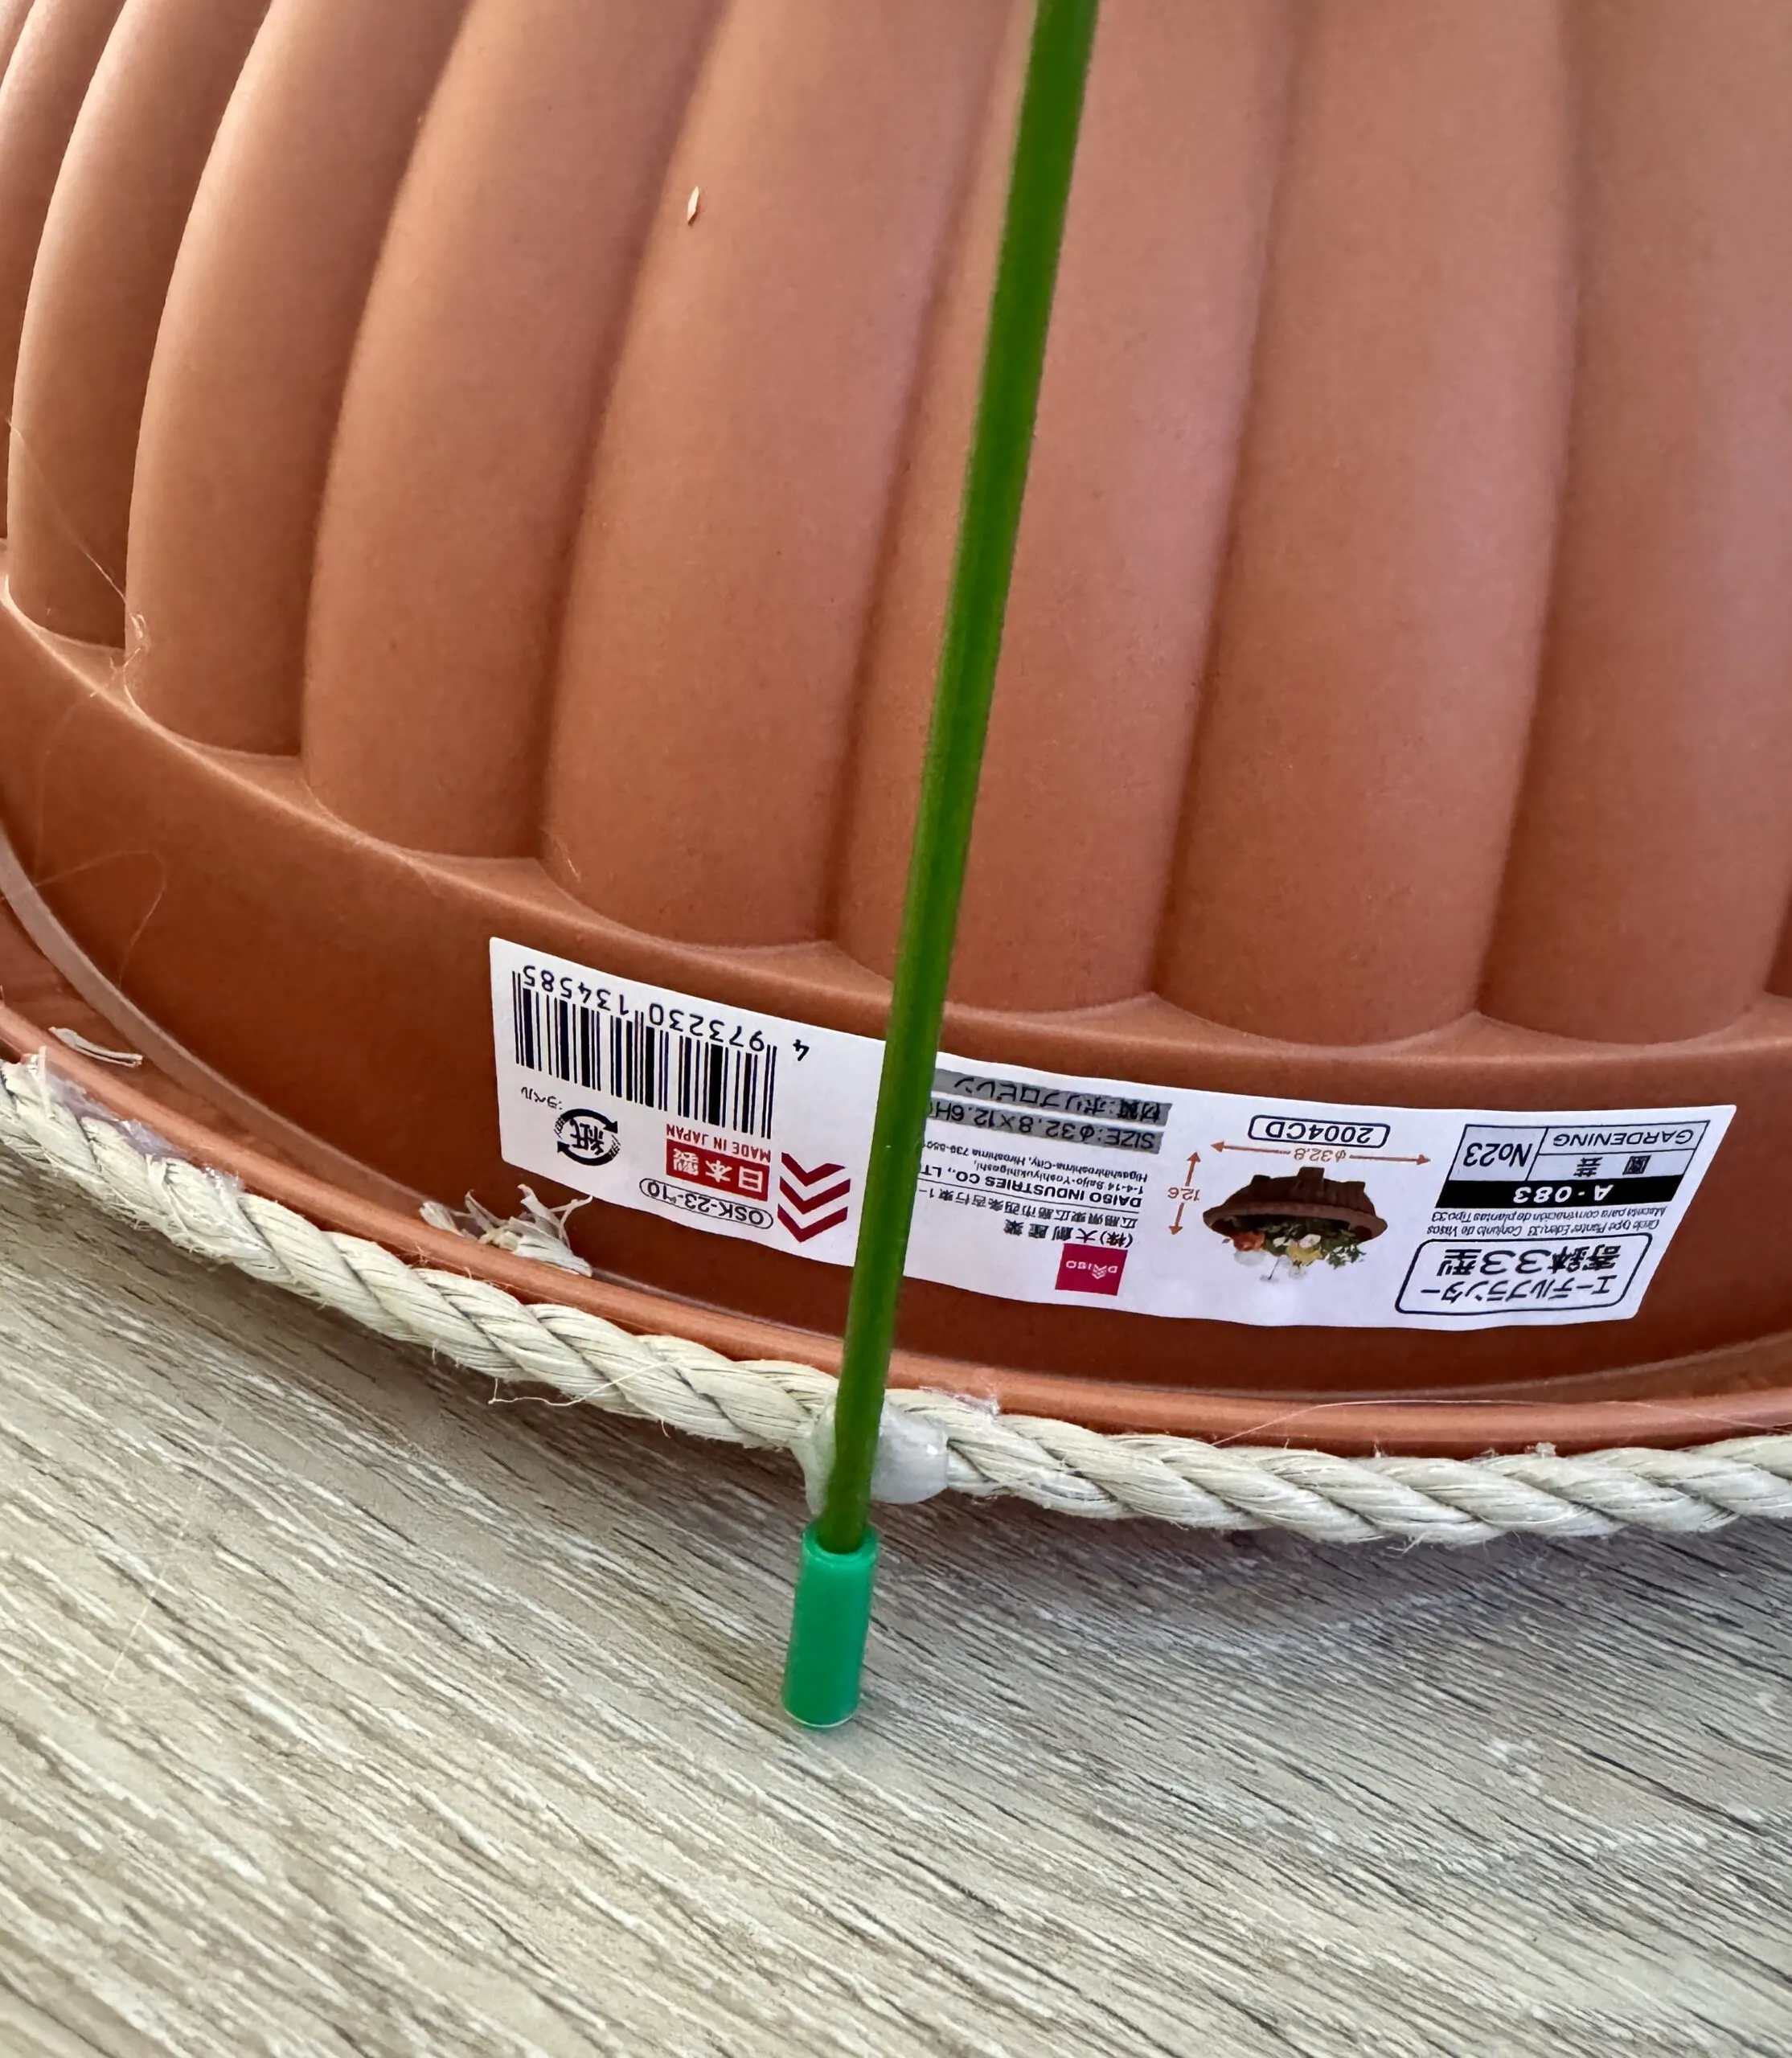
Next, I hot glued on 2ft tall orchid stakes I got from Daiso. The orchid stakes came in a pack of four, but I should have bought more because I ended up needing 6.
I was too lazy to go back to Daiso, so I hot glued and tied together some wooden skewers instead.
I tied a rubber band around all the sticks at the very top and added a giant glob of hot glue along the tips extra for reinforcement.
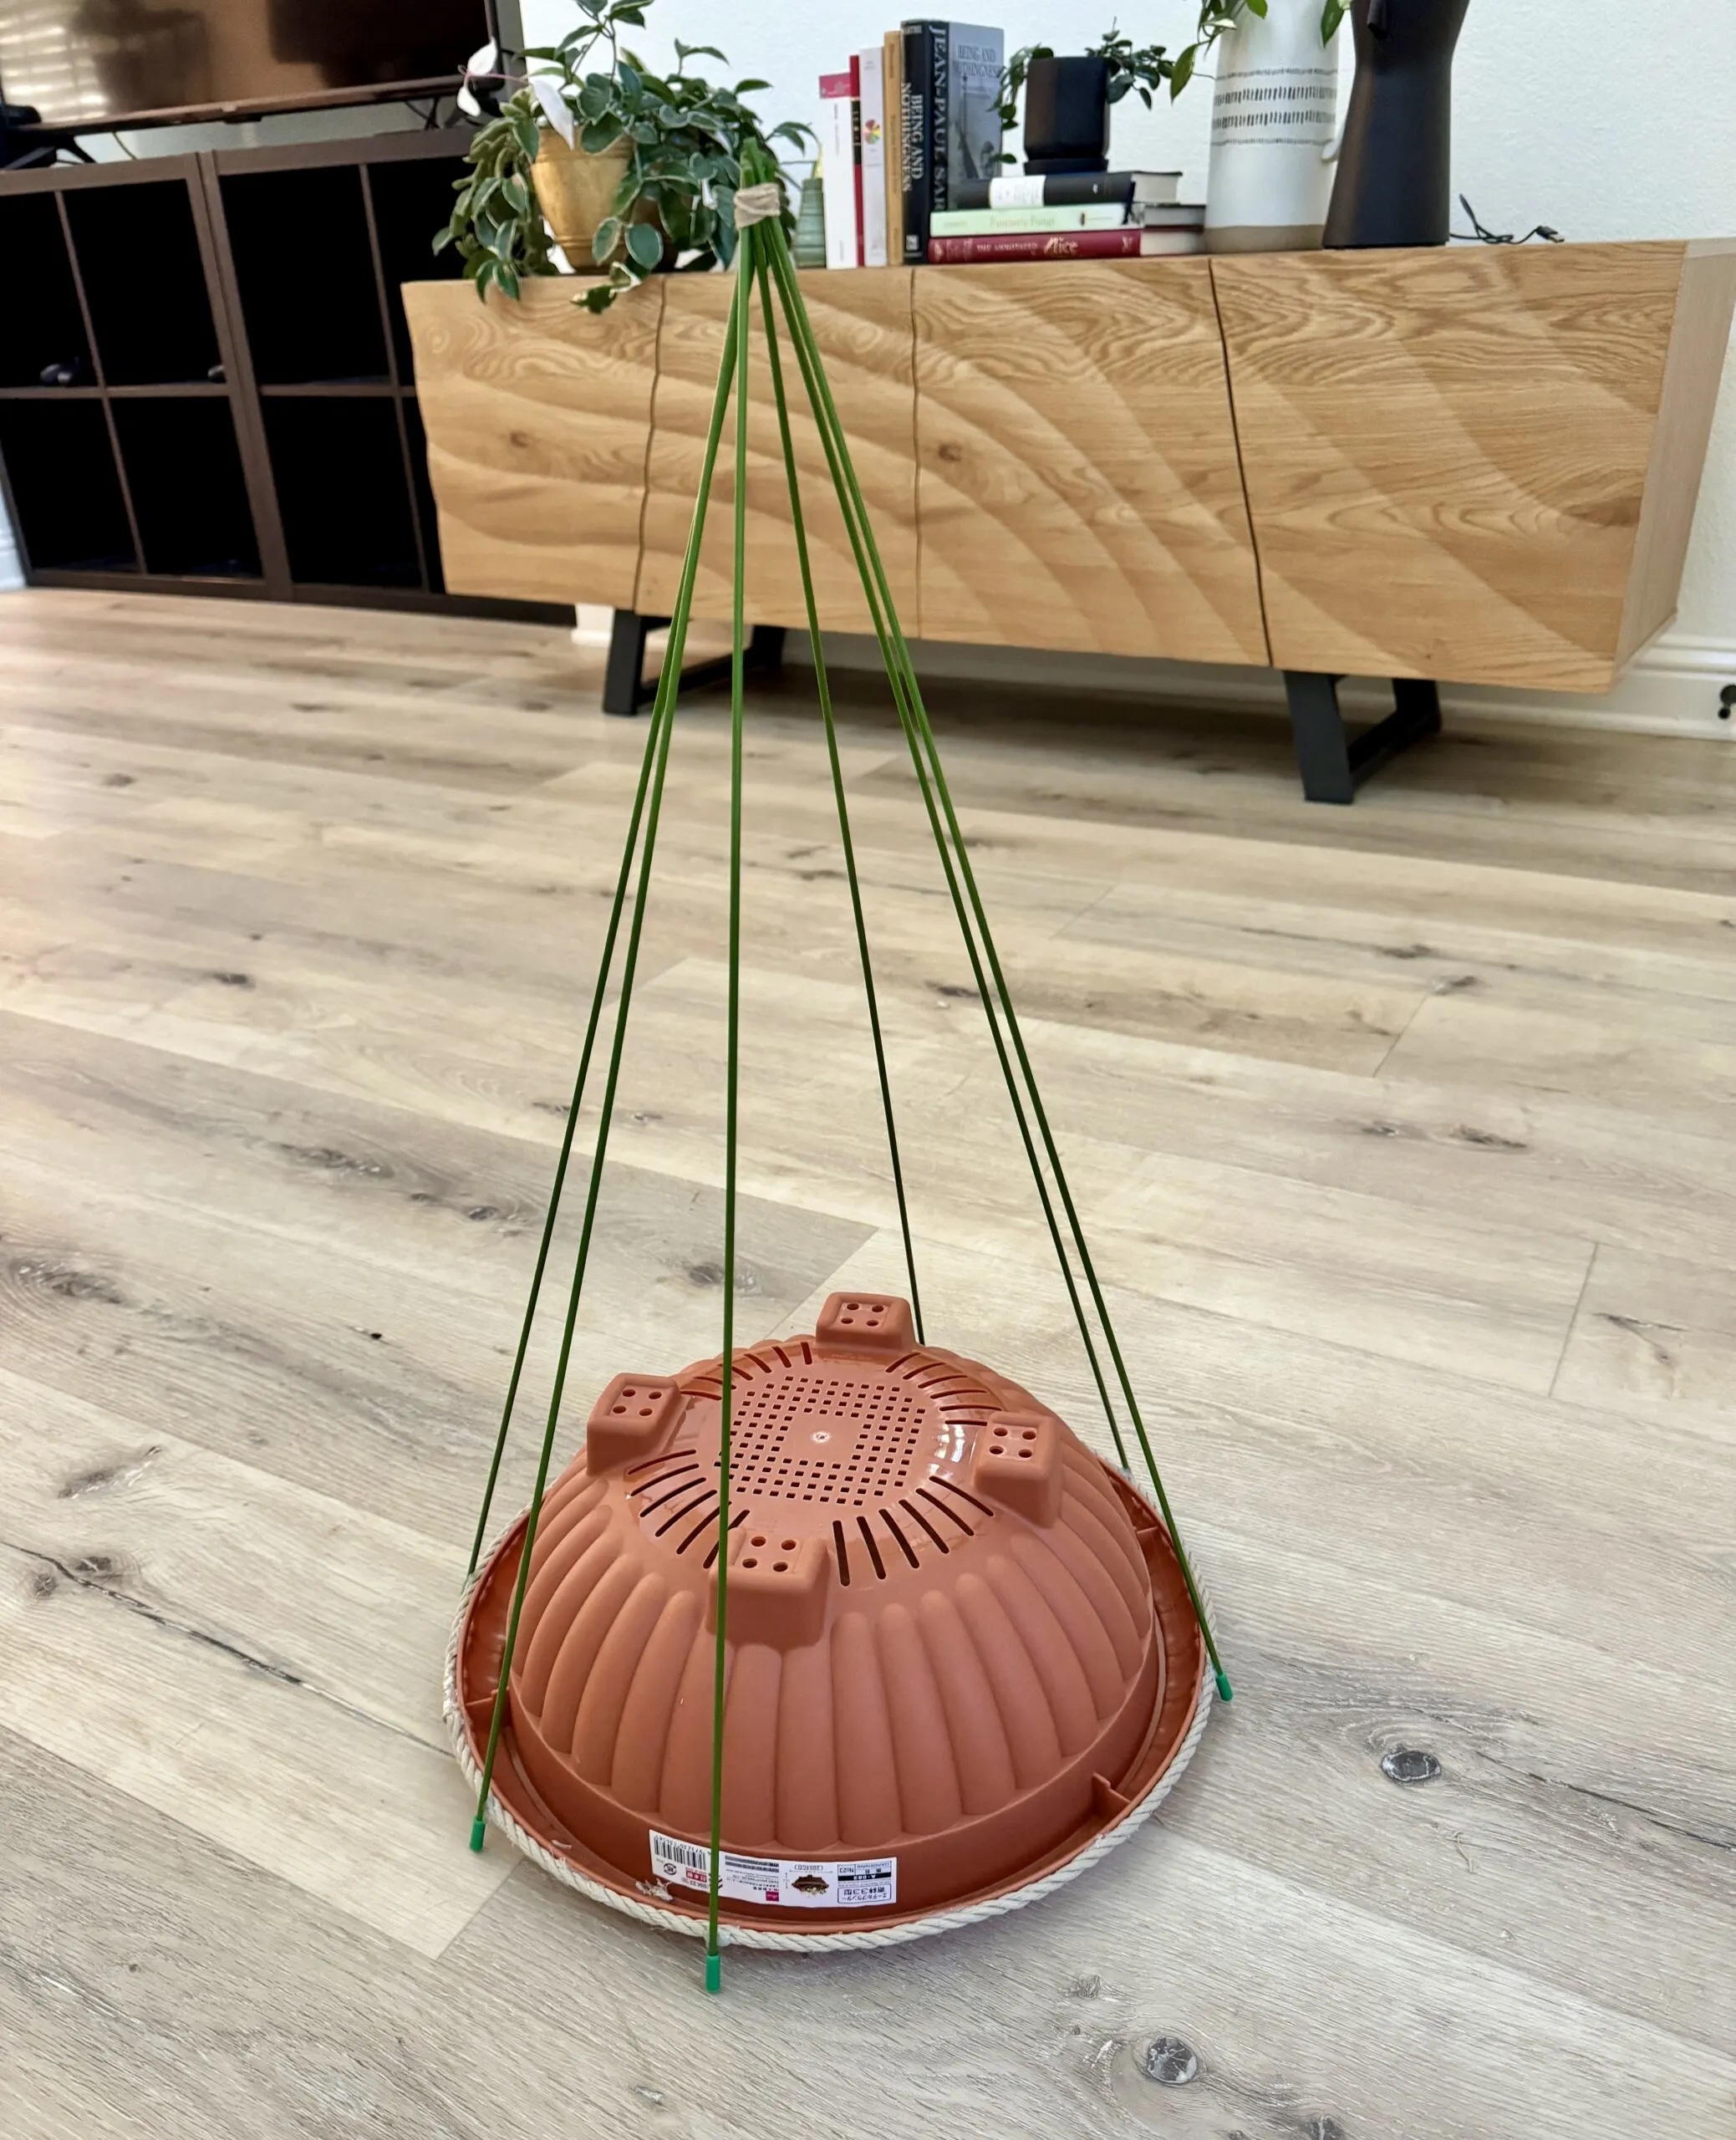
I hot glued on the star topper after this.
Once all the sticks were hot glued in the correct position, I hot glued some rope around the pot to hold the sticks in place. It should end up looking like you sandwiched the sticks in between the rope.
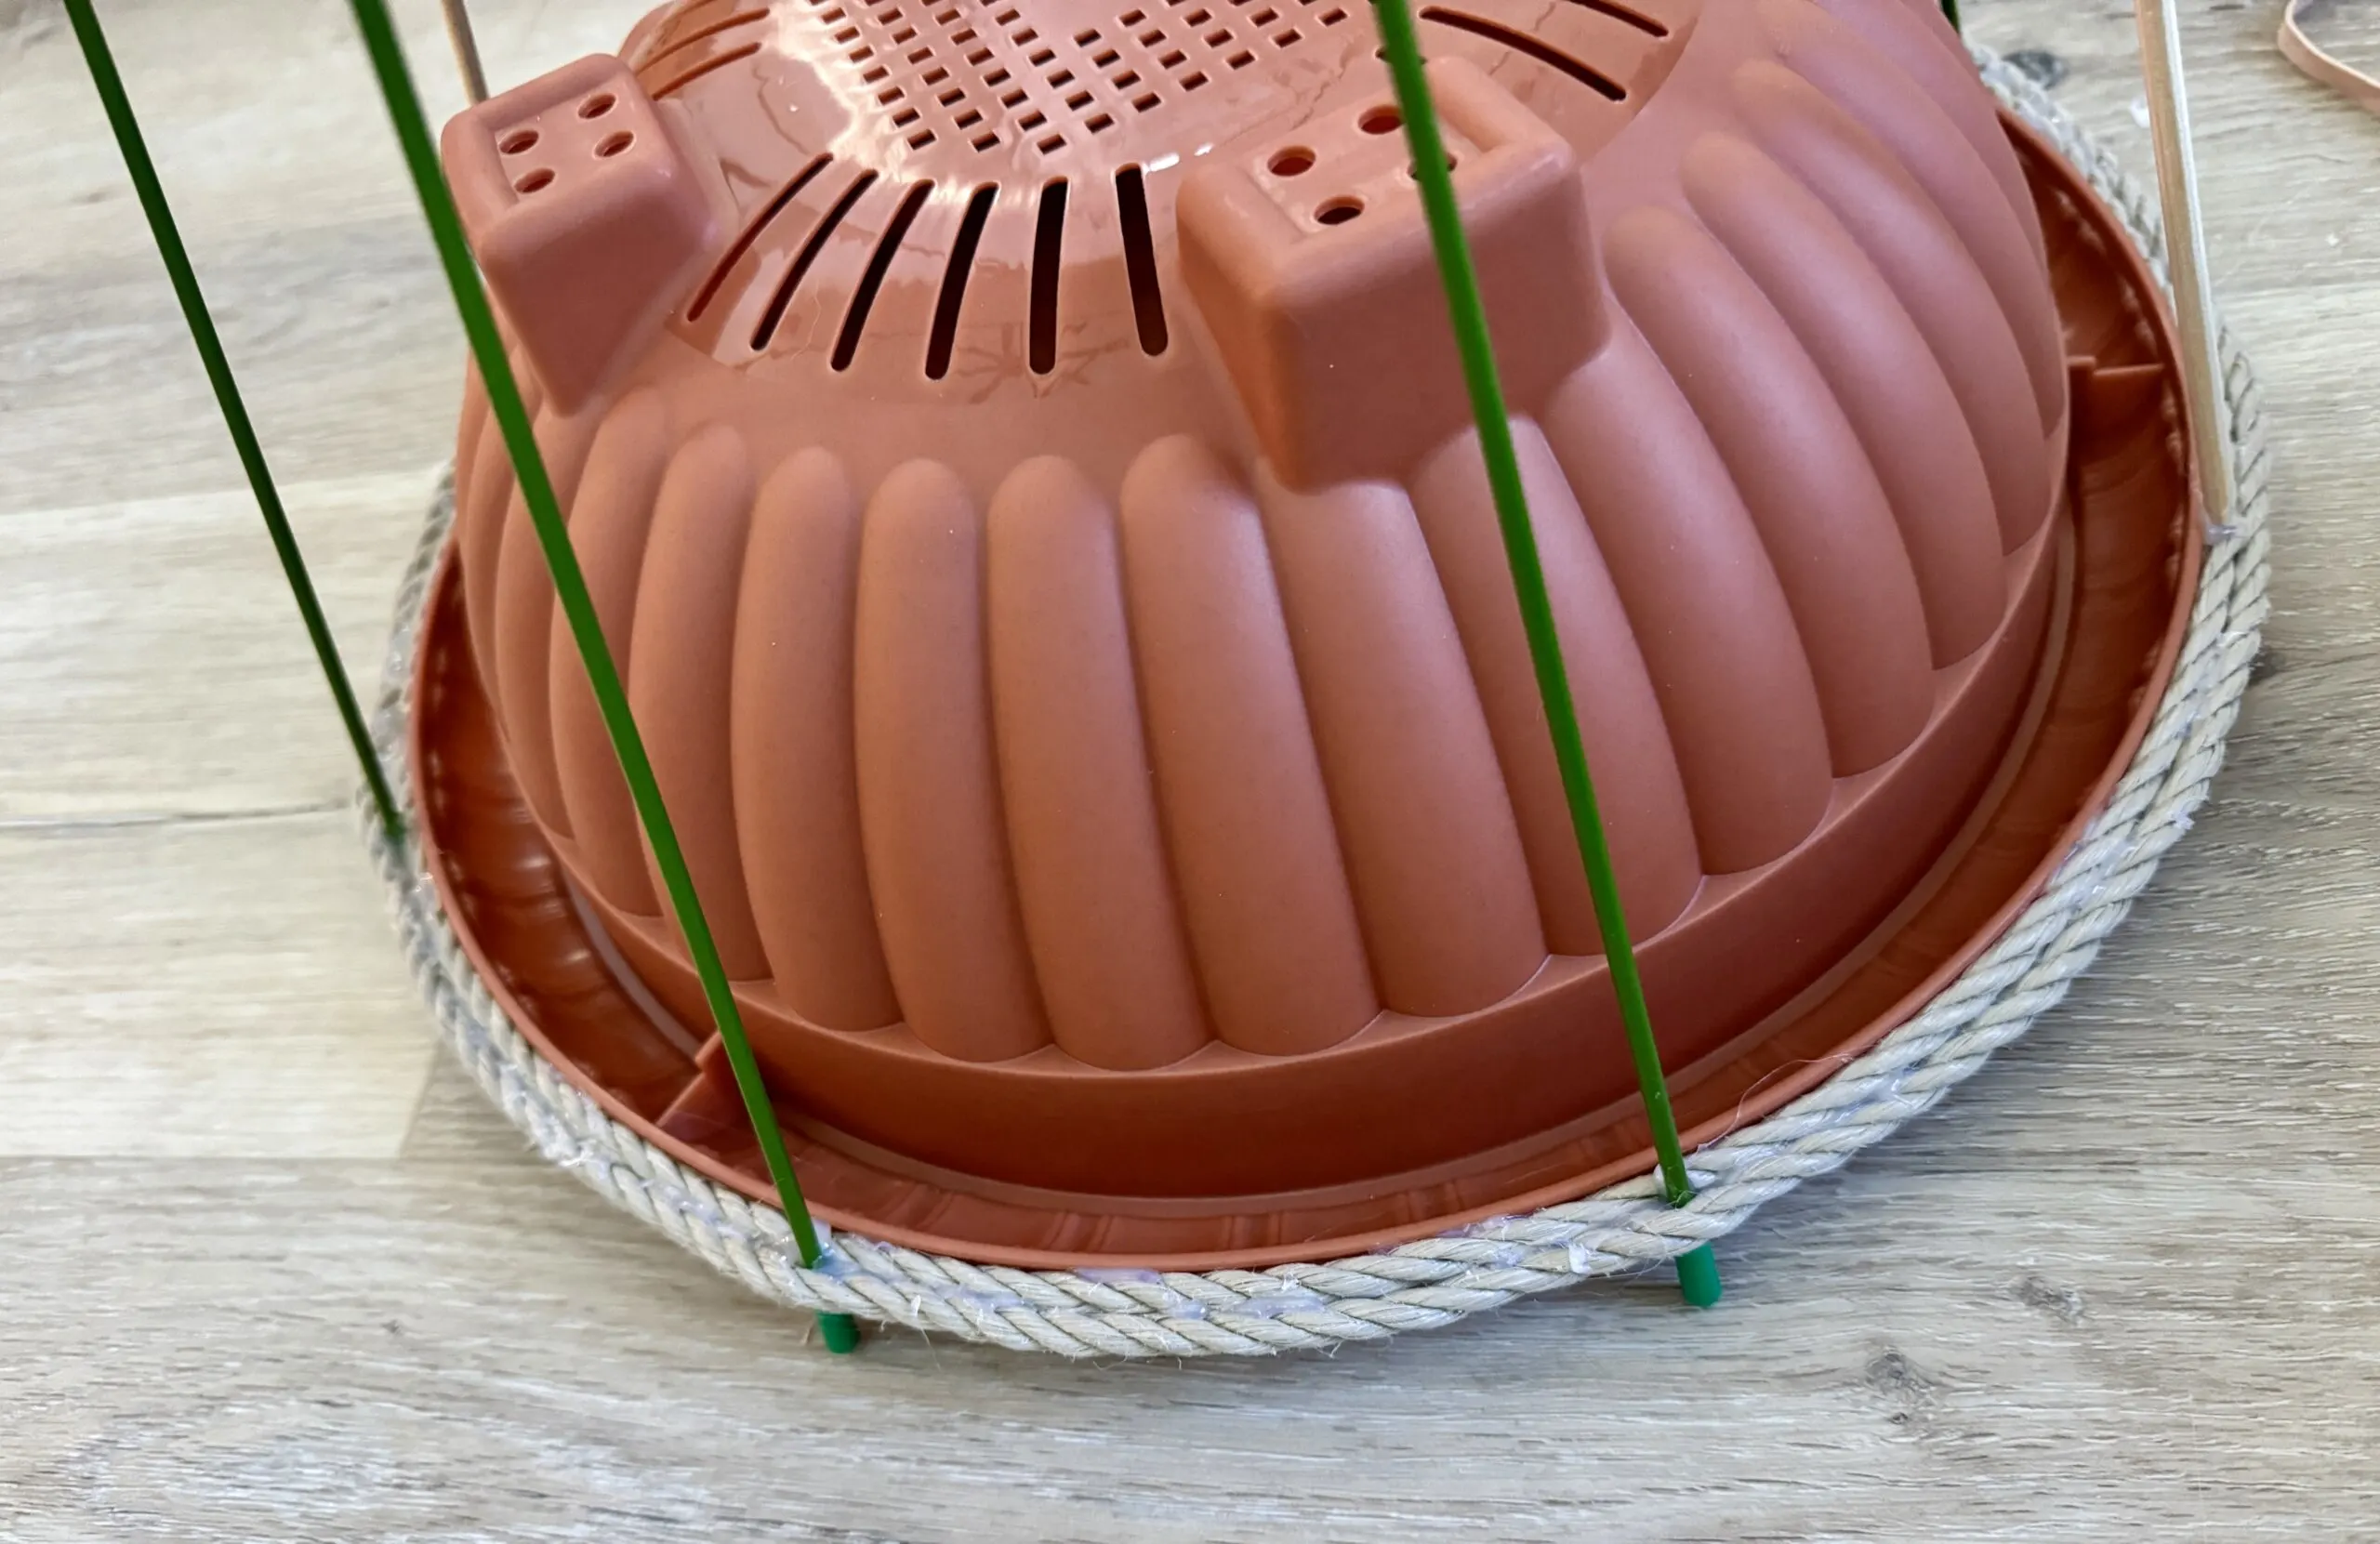
I added some burlap fabric to the interior, but you should ignore this step as it was completely unnecessary.
I only did that because I was afraid it would look gappy without it, but that wasn’t the case.
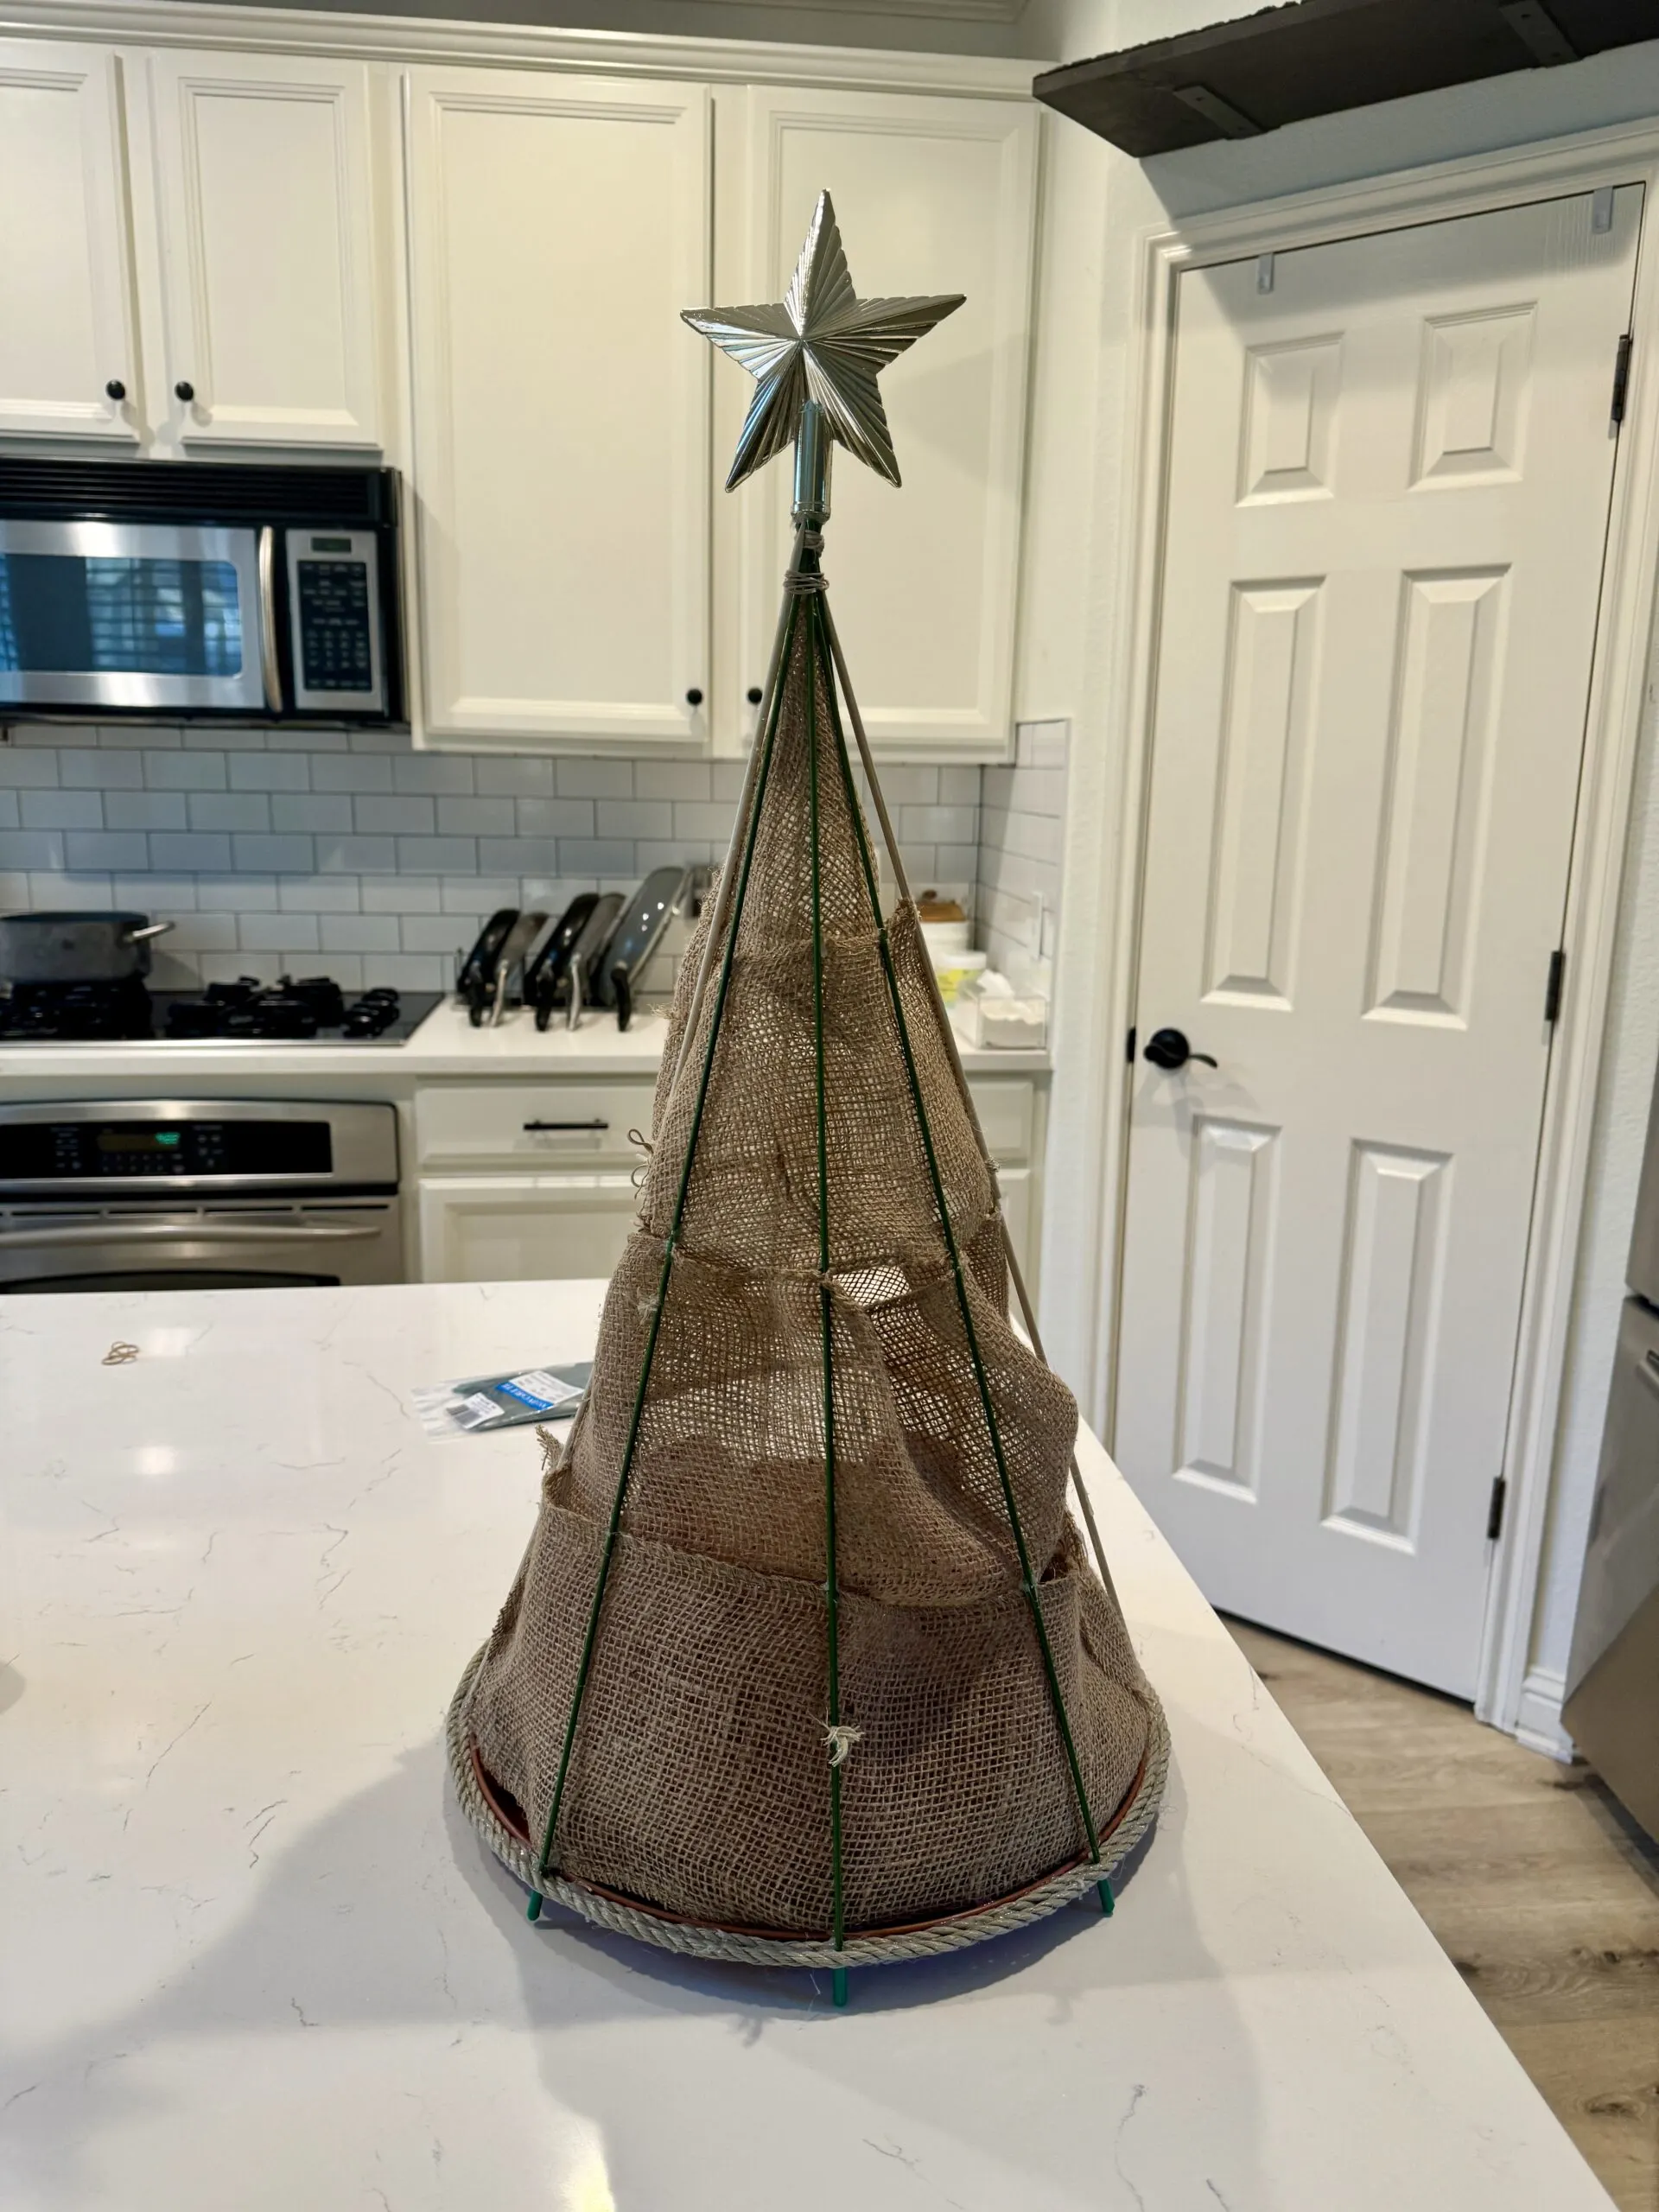
I did not take many pictures of the steps after this because I was convinced the project was going to be a failure – I’m sorry!
Using leftover garden netting, I wrapped it around the tree and secured it with 4 inch dark green zip ties. I trimmed the leftover zip tie ends with nail clippers.
Adding Branches to Tree Topper
Then it was time to add branches. I originally purchased a 9ft piece of garland from Amazon, but it was not the same brand as the one I got for the cat tree trunk because those were exclusively sold in 6 ft pieces.
I quickly found out this garland was not flexible to be wrapped around the mini Christmas tree.
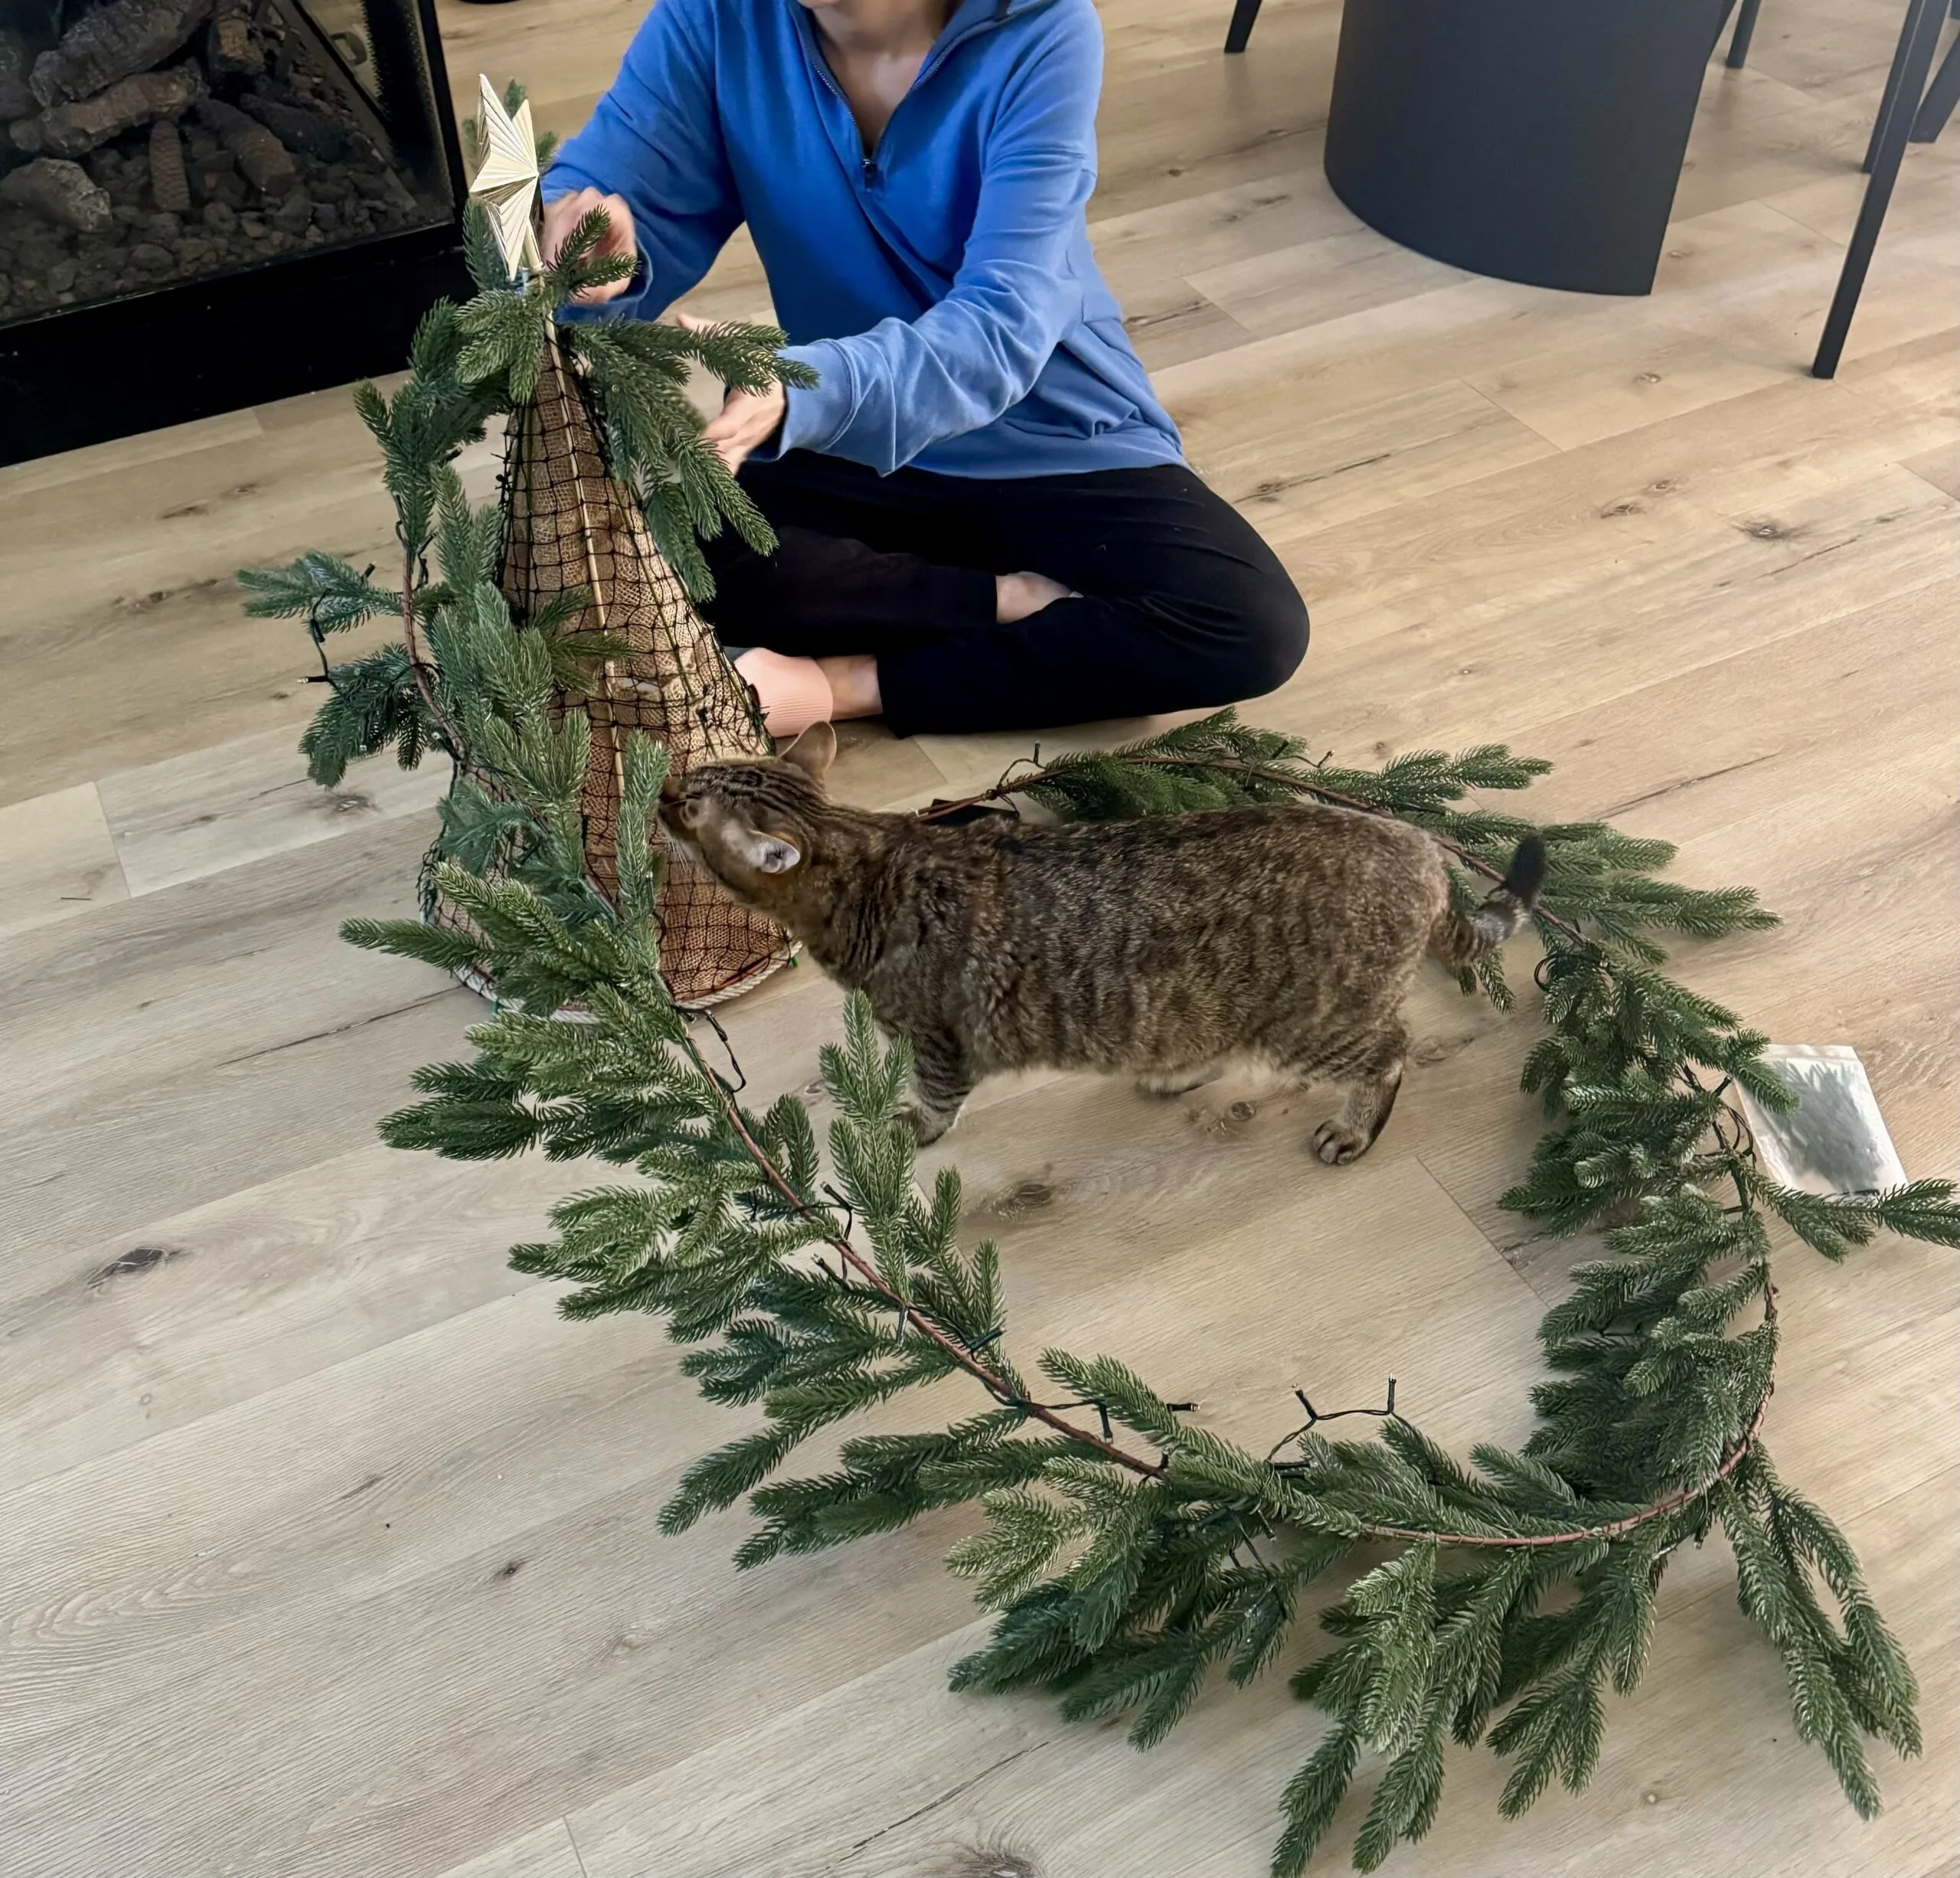
I ended up removing all the branches from the garland and setting aside the battery powered lights to wrap around it manually.
Don’t worry – I modified the supplies list to account for my mistakes. It lists all the supplies you should buy instead of the things I bought that didn’t work out.
Bending the stem of each branch, I created a hook-like tail and placed it into the loops of the netting.
I started from the top and worked my way down. In retrospect, I should have left the last few inches at the bottom because my branches ended up making the tree slightly too wide for the basket and I didn’t have as much room to add fake snow.
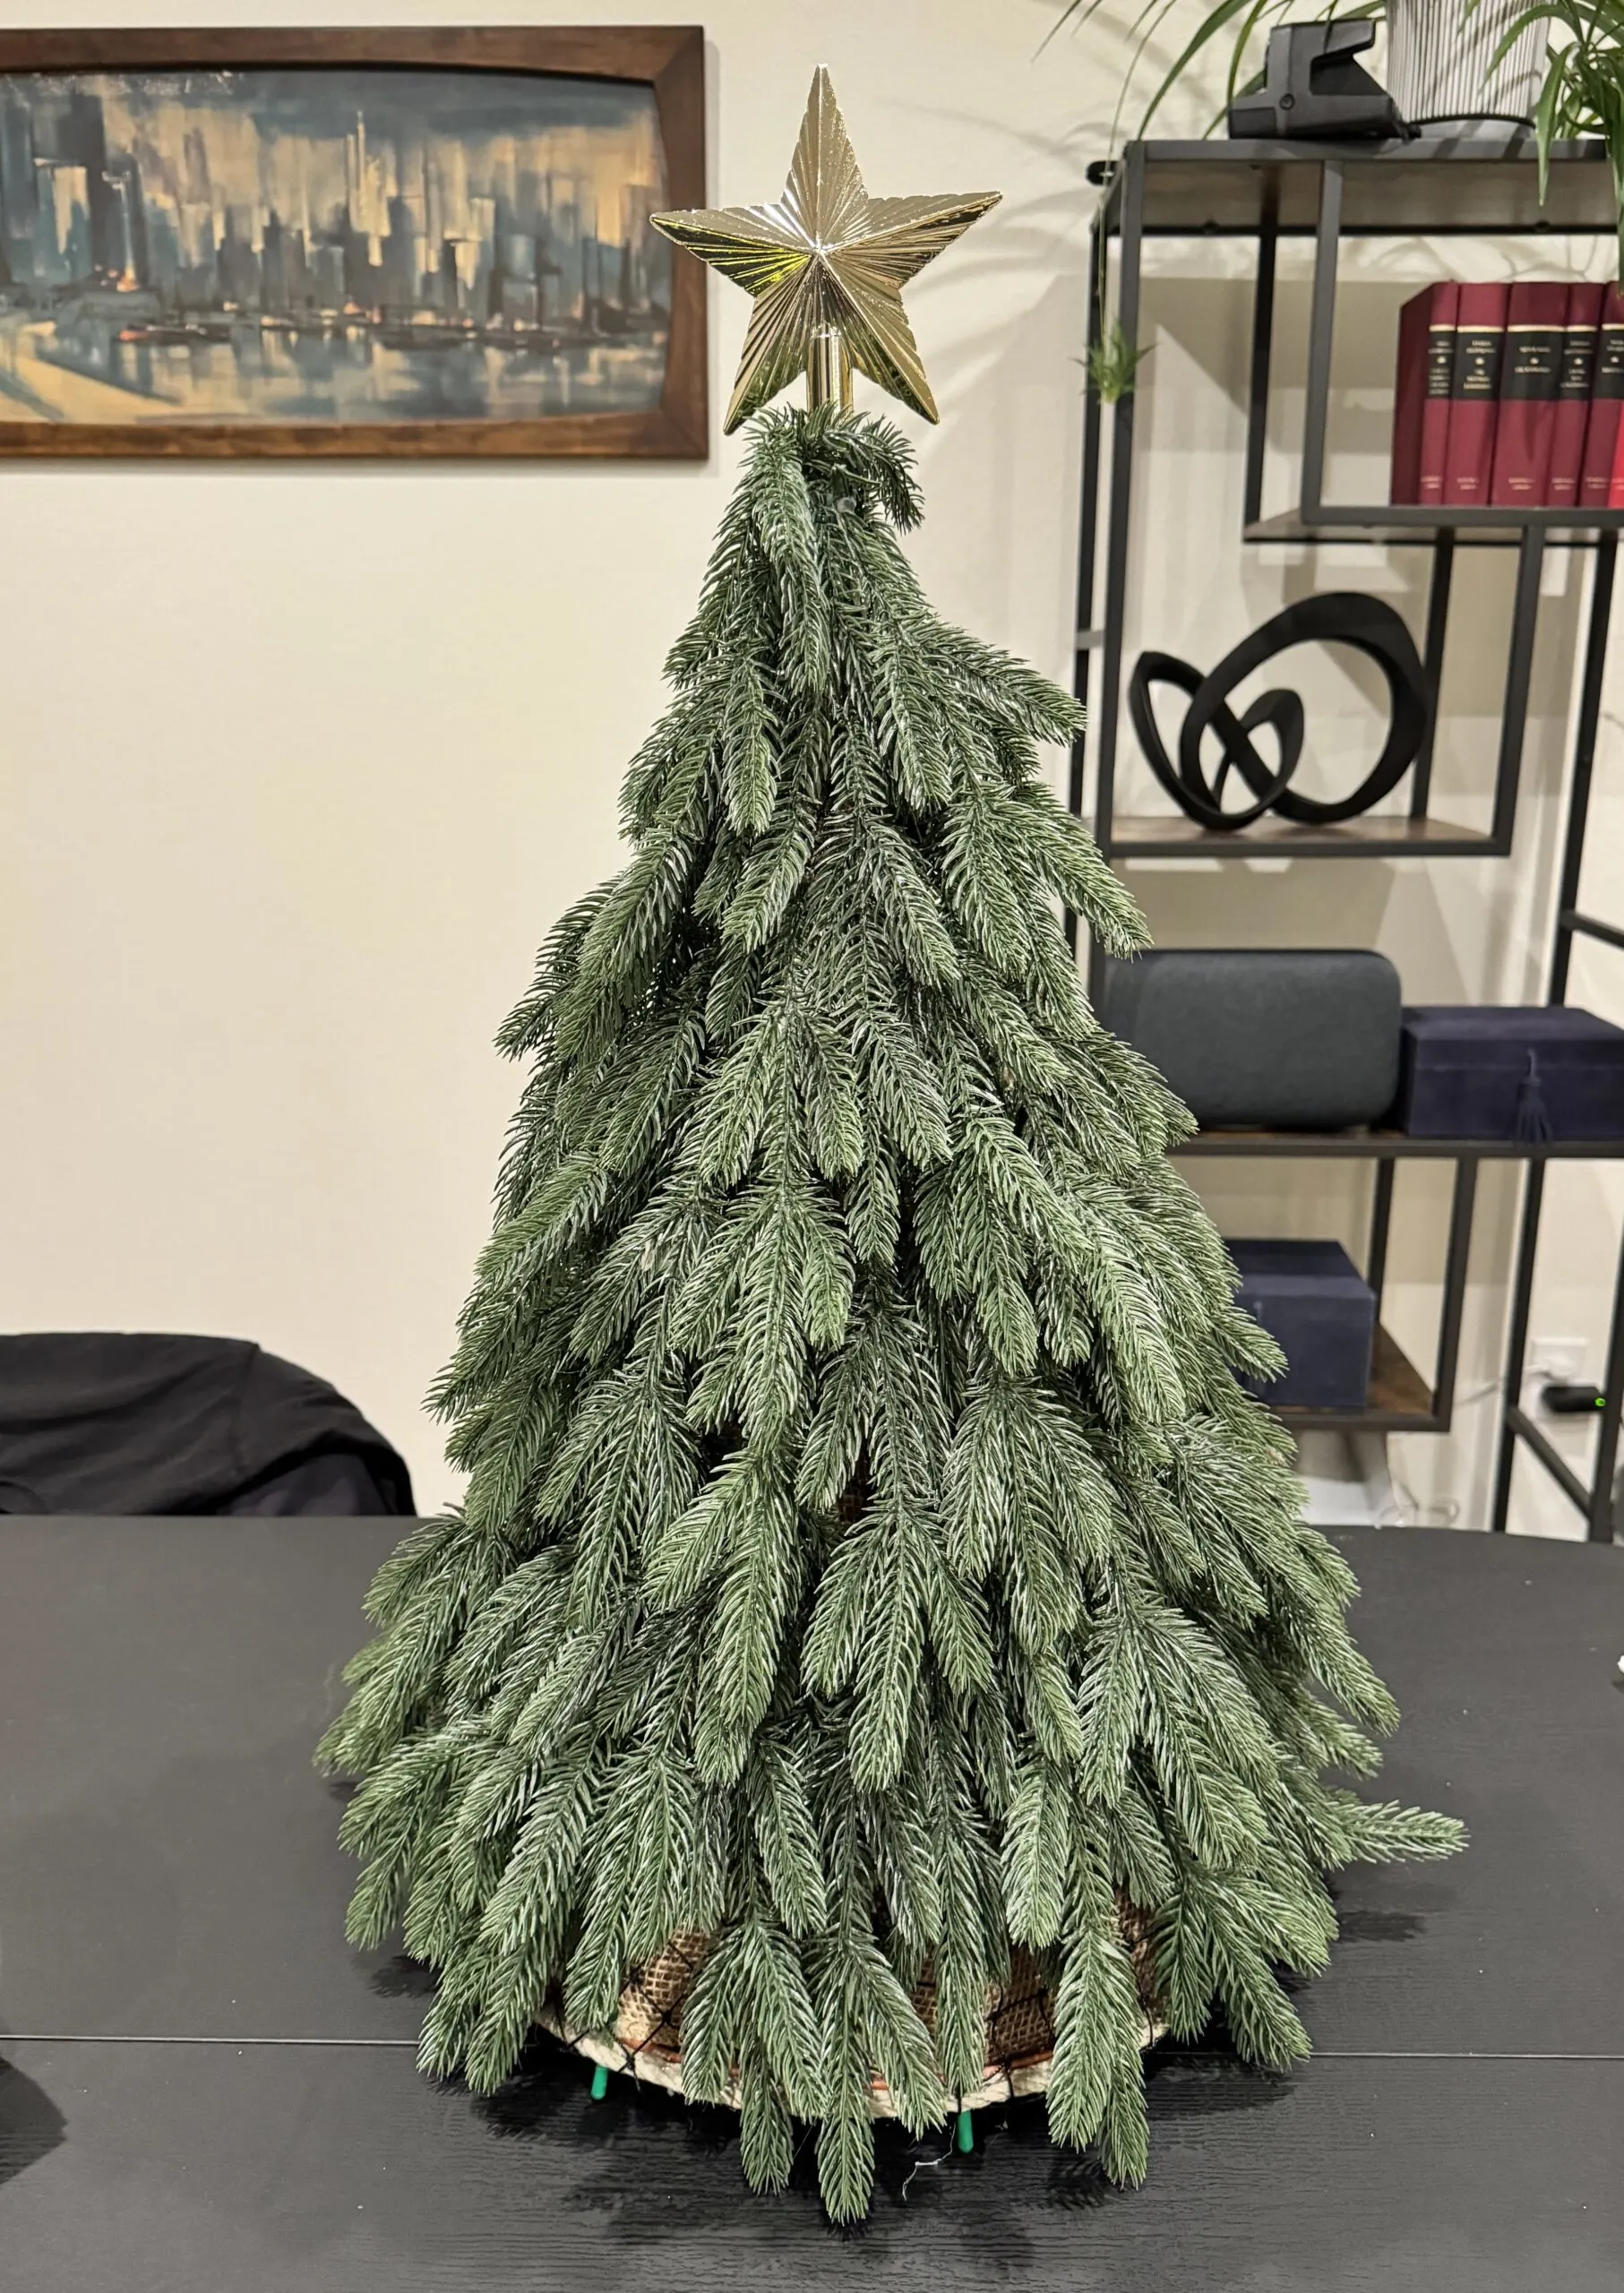
Next, I wrapped the battery powered lights around the tree, placed the tree in the basket, and added some shatter-proof ornaments.
Then I added some chunks of fake snow to the bottom so the white from the fake snow complemented the white cushions in the interior of the other 3 baskets.
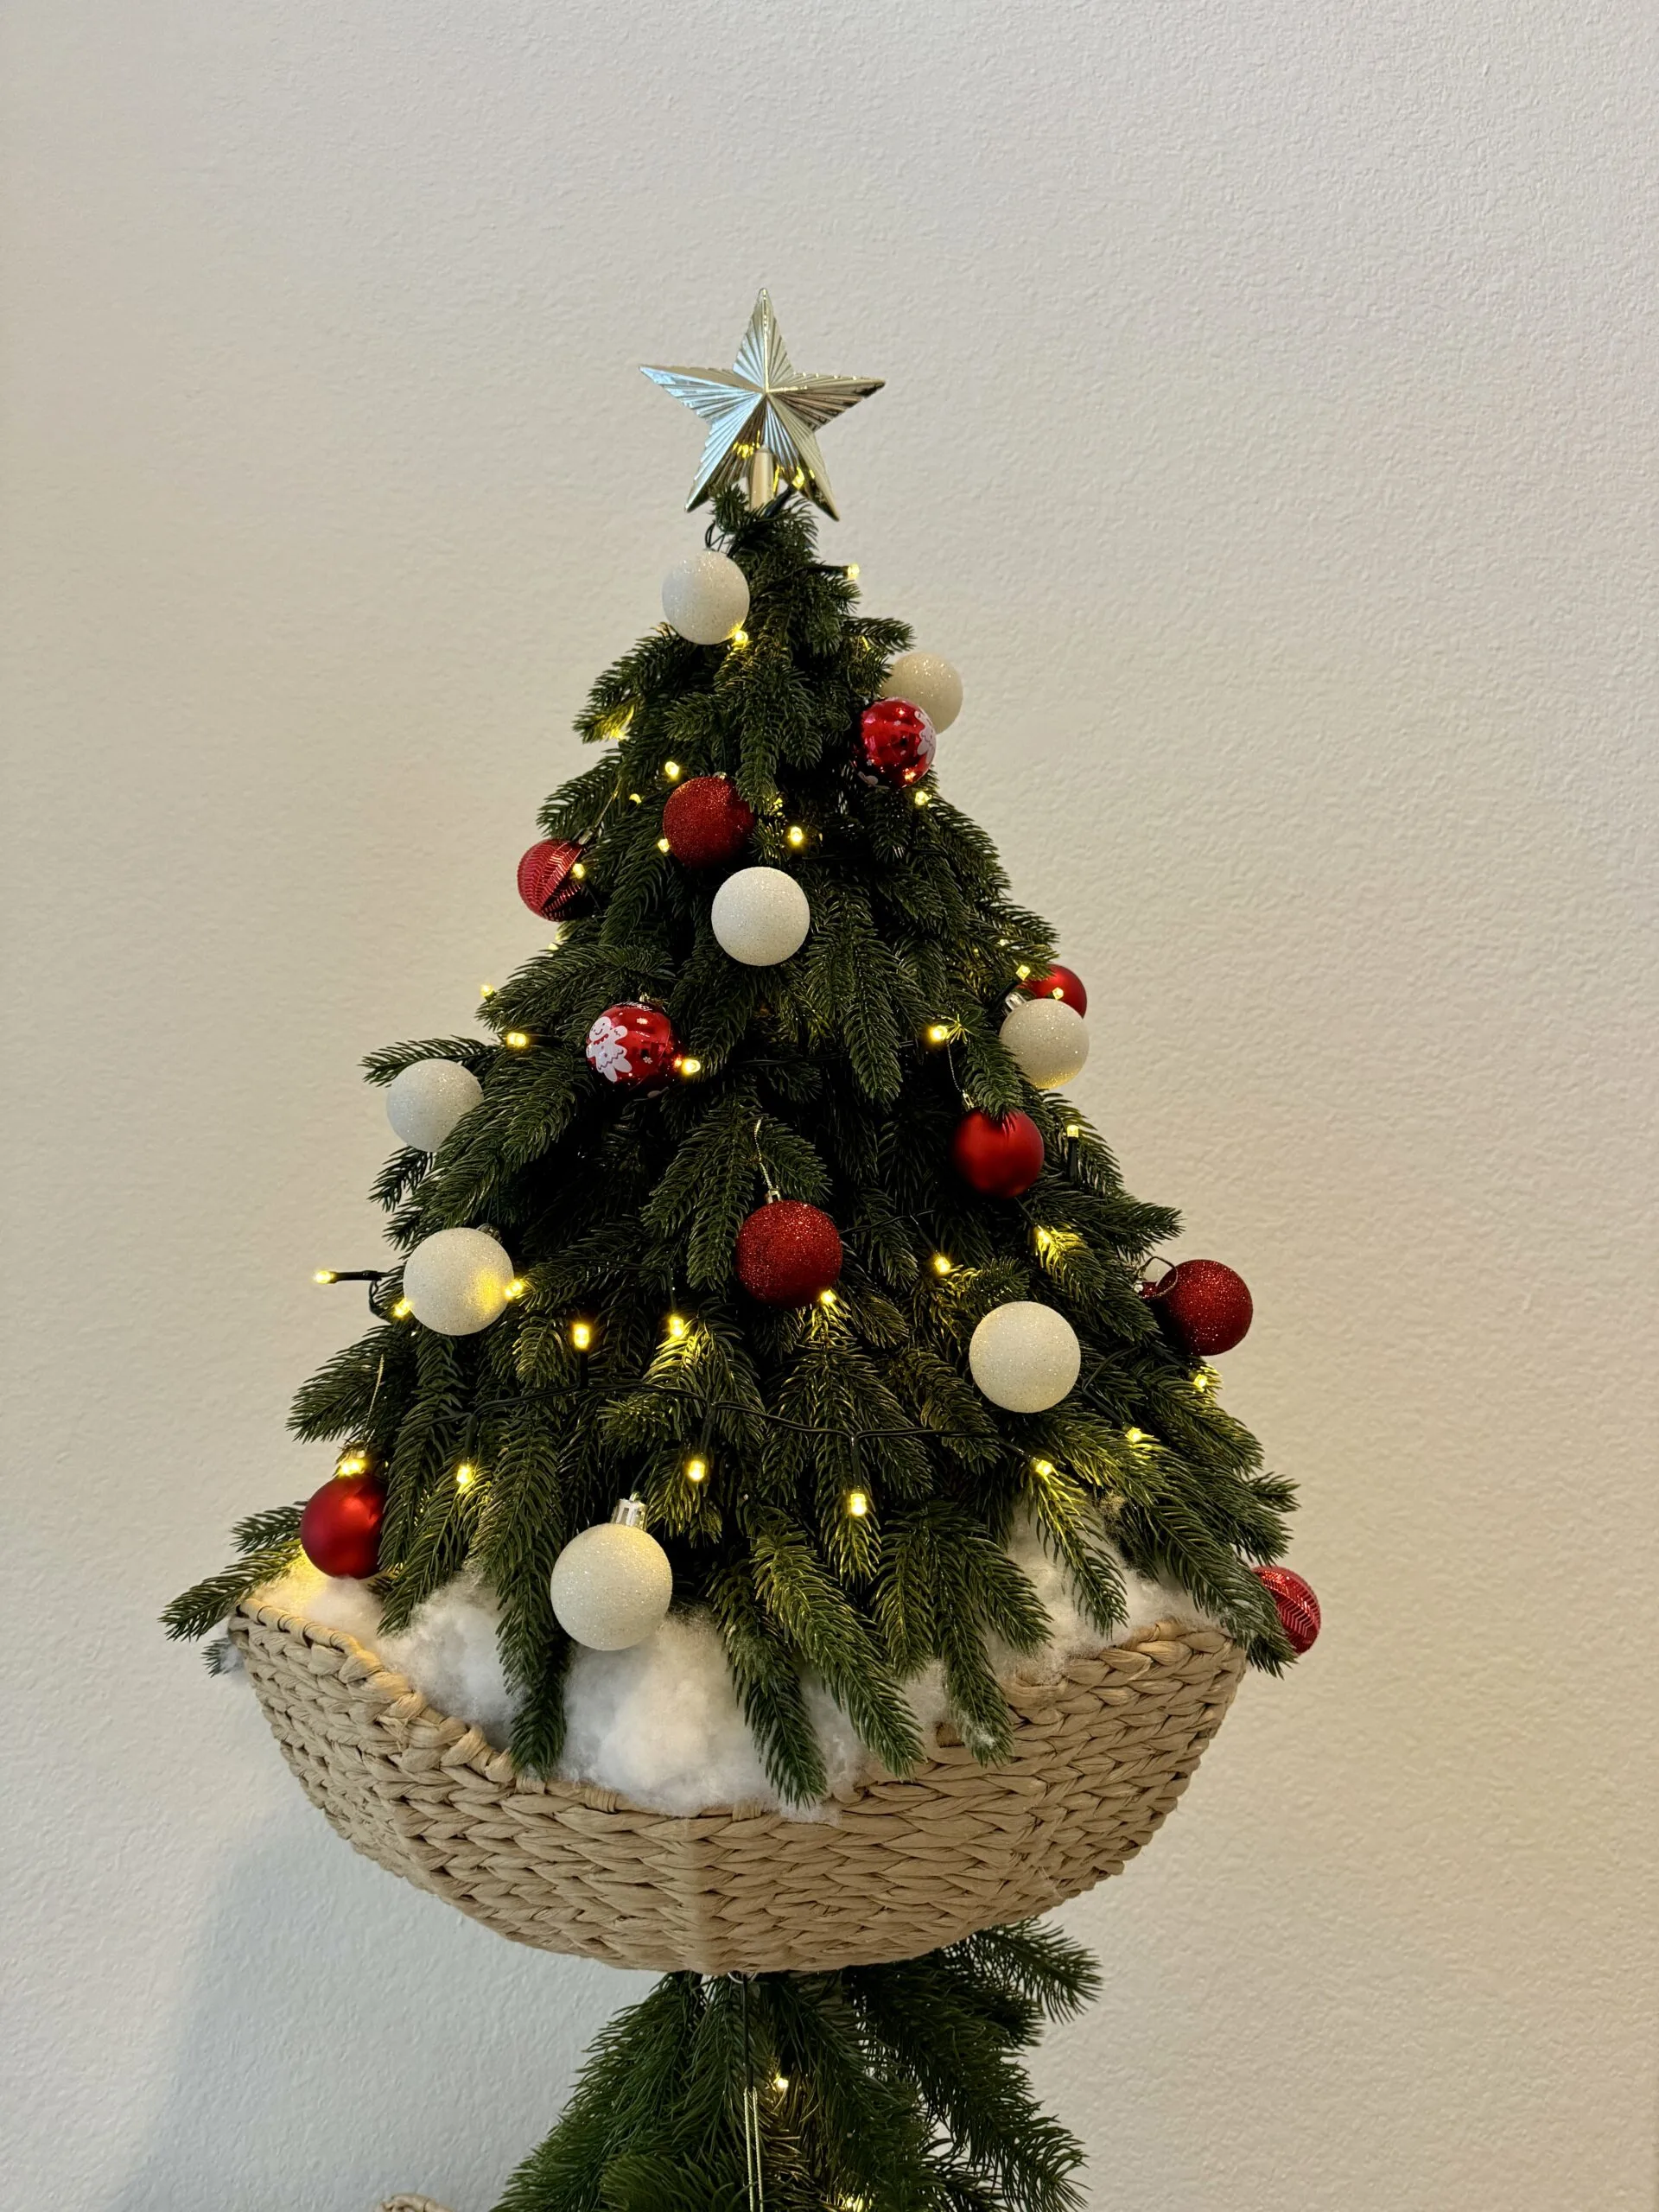
The tree is placed in the basket without reinforcement – it’s not secured with anything. I’m not worried about my cats knocking it over because they don’t climb up that high.
It should go without saying that if your cat hangs out in the top basket or would climb up there and try to knock it down, you should either omit the basket tree topper or find a way to secure it.
Prioritize Your Cat’s Needs
There you have it, folks. A funky and semi-functional Christmas-themed cat tree with cat-conscious decorations.
I can’t stress this enough: it’s more important that your cat benefits from the actual purpose of the cat tree than for your cat tree to be decorated. Cats need to have safe places to scratch and have access to vertical spaces.
Again, I decorated my cat tree because I know my cats well enough to determine what they would or wouldn’t destroy.
Please don’t do this unless your cat tree and cat’s behavior meet the criteria stated earlier in this article.
It’s also important that they have plenty of options for surfaces to scratch on and vertical spaces to climb in the event the decorations make them less interested in the cat tree.
If your cat tree is the only place your cat can climb and scratch, don’t do this.
I think I’ve rambled enough. Merry Catmas and Happy Mew Year!
